CBRRRT
How to make a fiberglass seat mould.
by , 21-12-2011 at 06:07 AM (316814 Views)
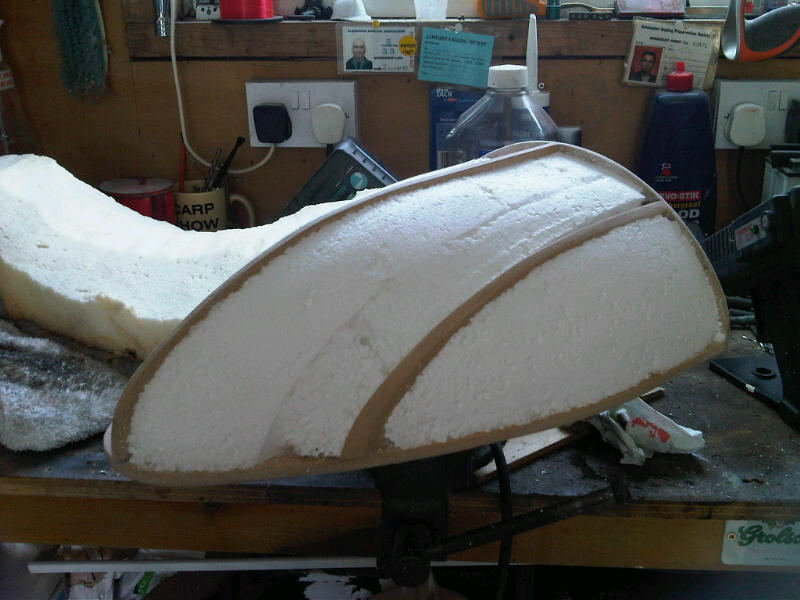
First I'm going to make up a form for the pod I will cast then graft onto the pan. The MDF form will be filled with expanding foam then sanded into shape and fine filled.
From this I will take a cast and produce a mould to reproduce the finished pod.
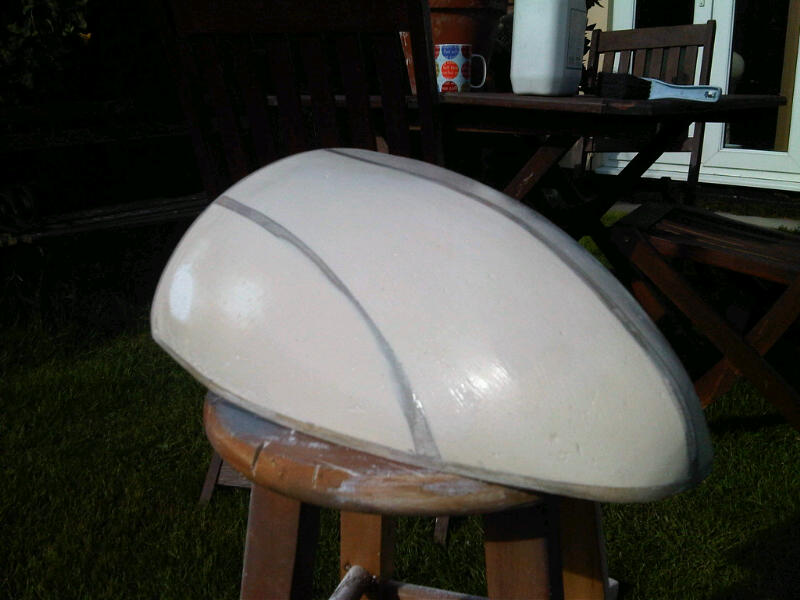
Shape looks right
As does the height.
Ok, back to this for a minute.
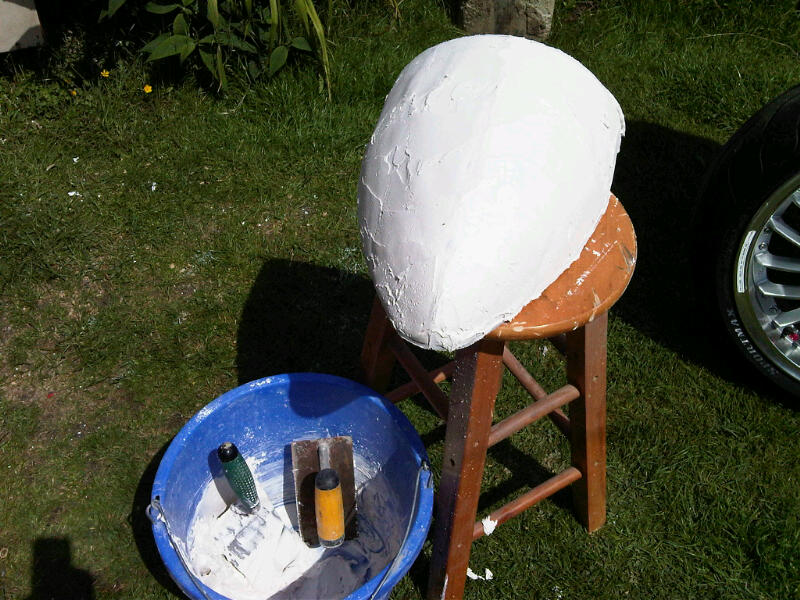
I filled the voids with some polyfoam packaging blocks then sanded them sub-surface of the frame edges. The reason for this is, If I fiberglass straight onto the polyfoam it will melt as the glass starts to cure, and I wont get a crisp finish to cast my mould.
I used construction filler to go over the whole plug and I'll sand it back to the spines that form the frame work.
It will need a few more fills and sand to get it right, but it will be worth all the effort.
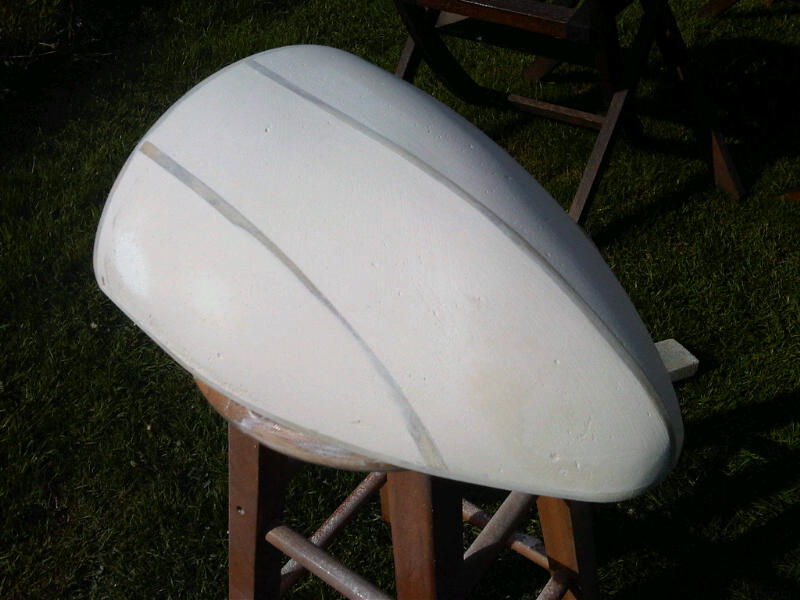
Next I gave the pod a quick sand
Then gave it a coat of PVA to seal it
The filler has gone off enough to scrape and sand back to the markers and get the rough shape
I'm gonna let it dry for another day then give it a 2nd fill
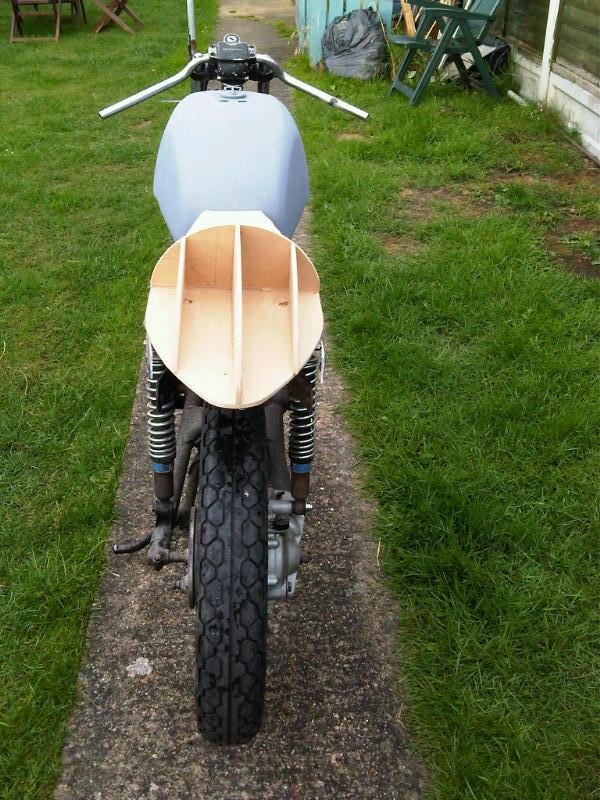
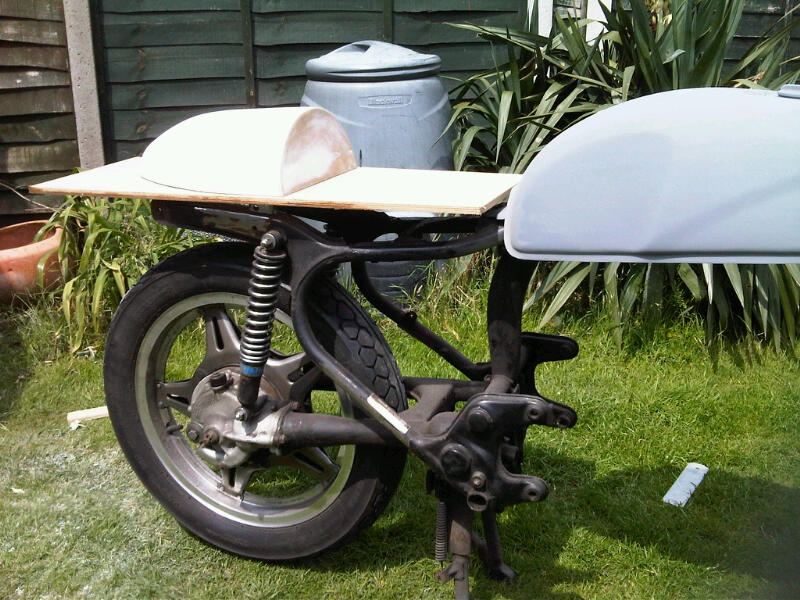
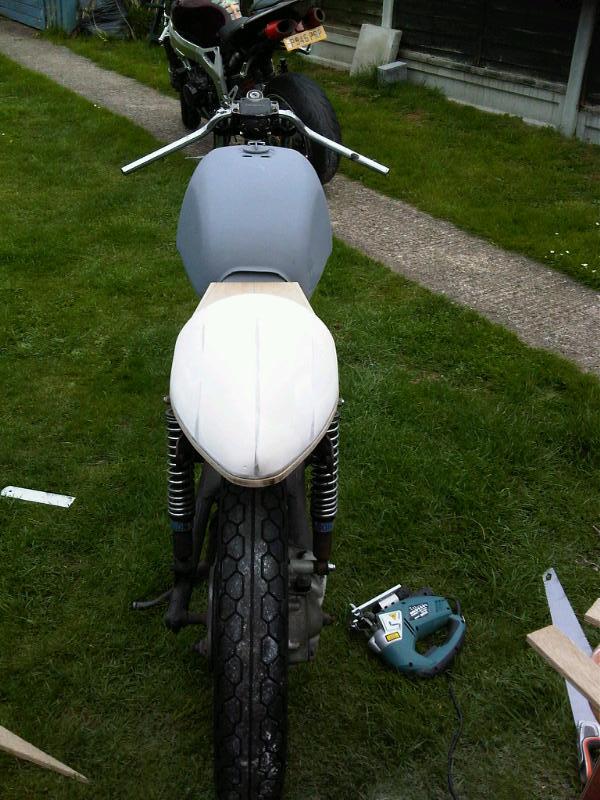
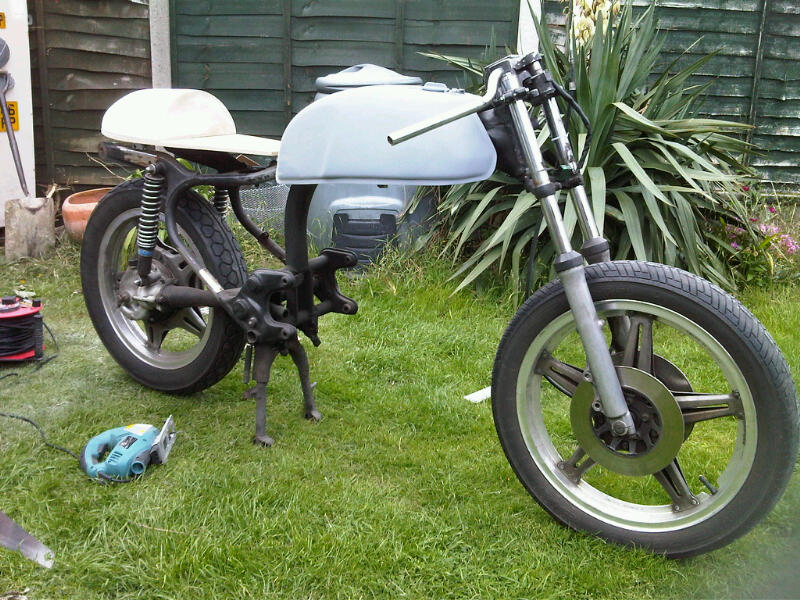
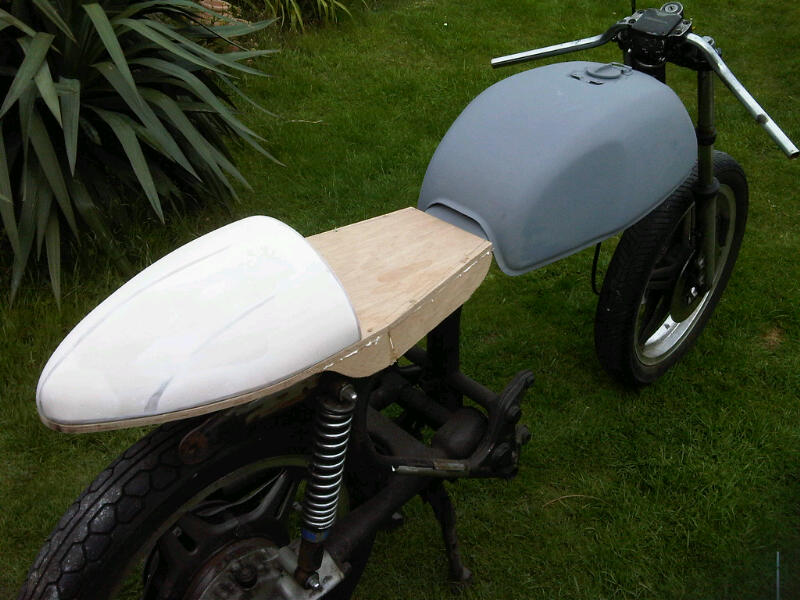
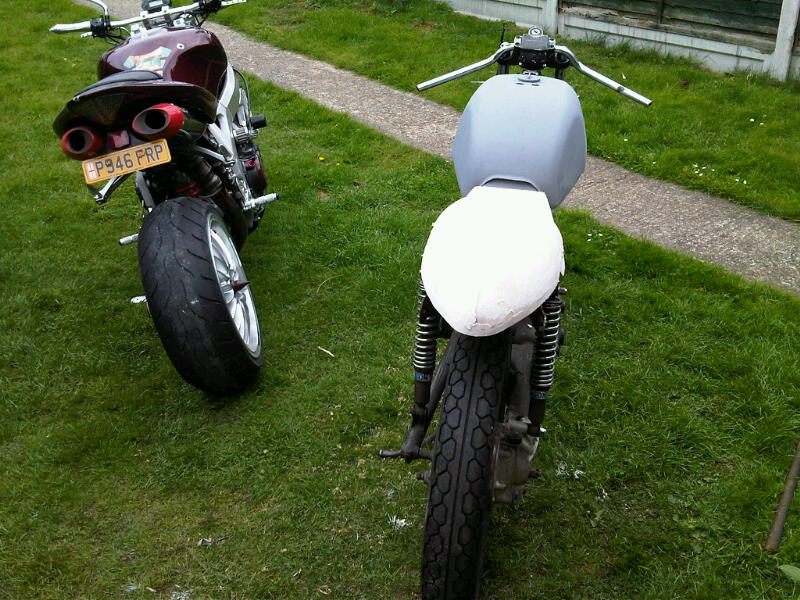
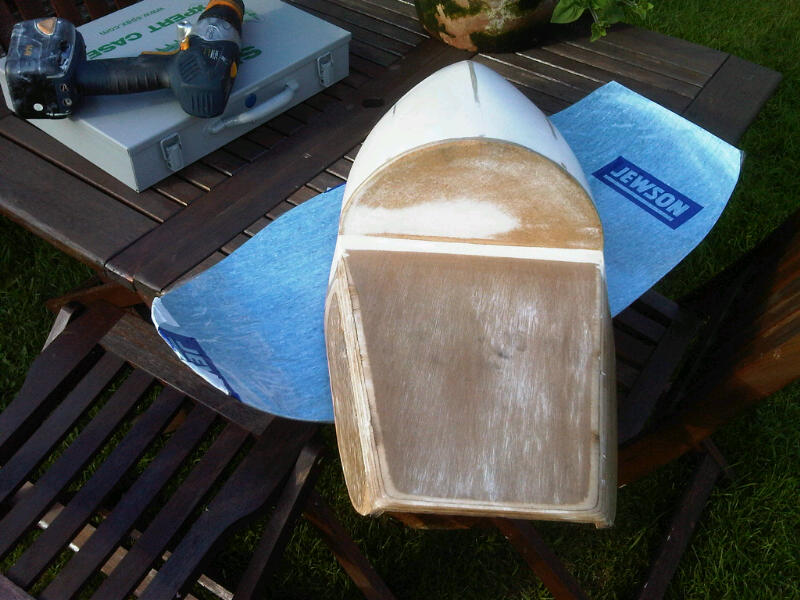
OK, on to the base
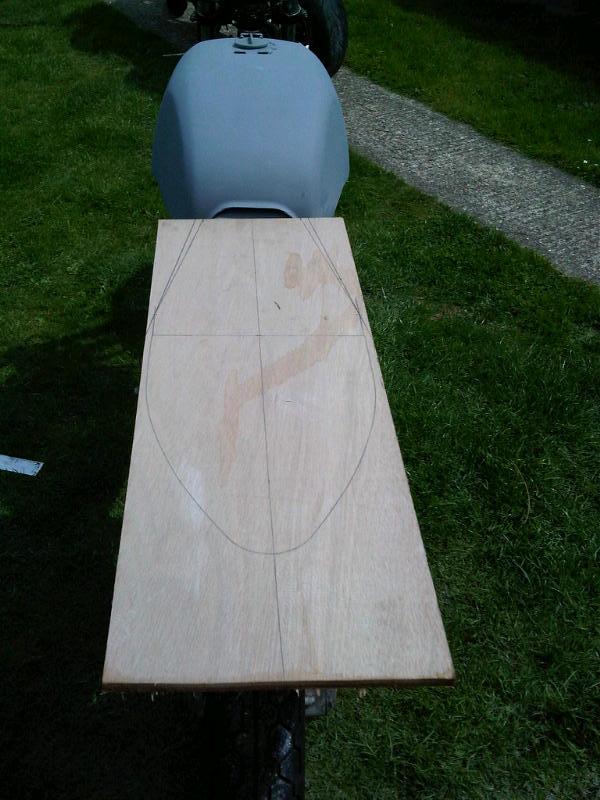
I placed a section of 12.5mm ply on to the frame and marked a center line on it, then from the front marked back to the pod 330mm and sat the pod onto it.
I marked round the pod and marked up the front of the seat
The it was a quick wiz round with a hand saw and jig saw for the curvy bits.
I need to do something with that gap under the seat above the frame
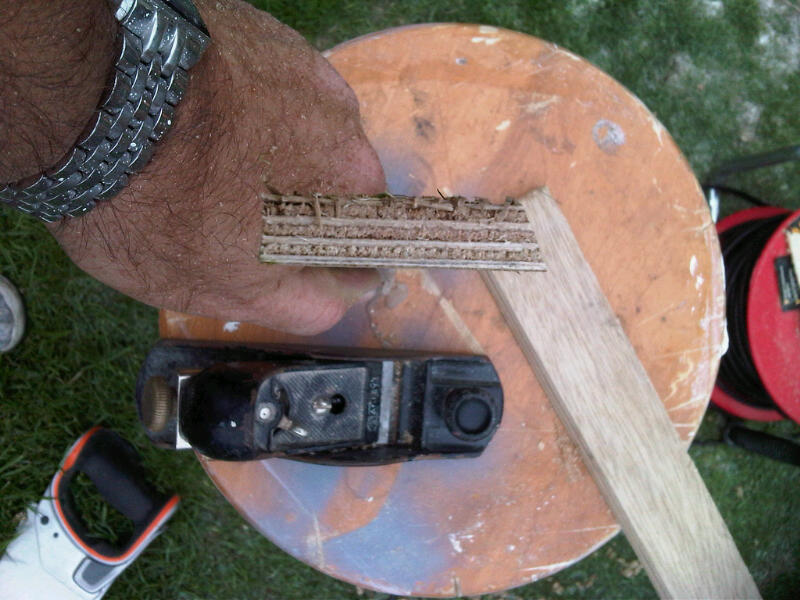
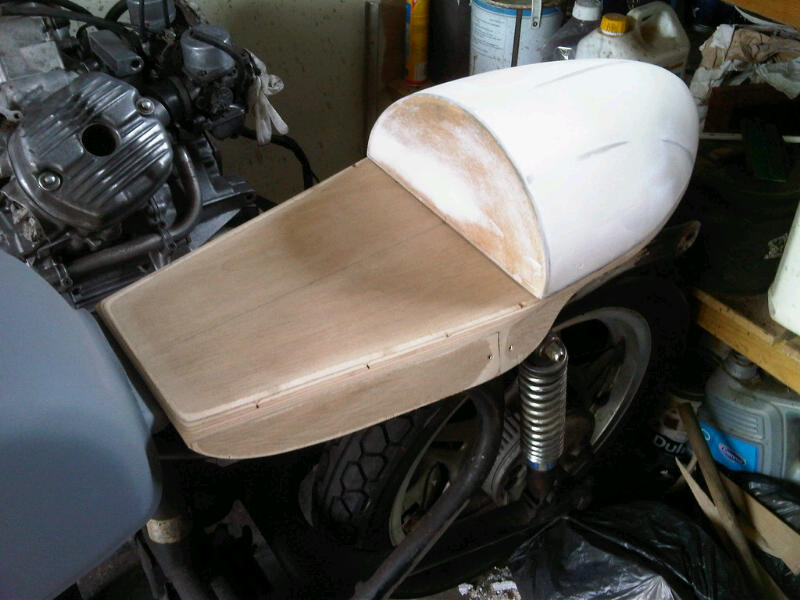
I cut some blanks and ran a plane over the edges to bevel them as I want the sides to taper out
Its important to get both sides the same so take care doing this
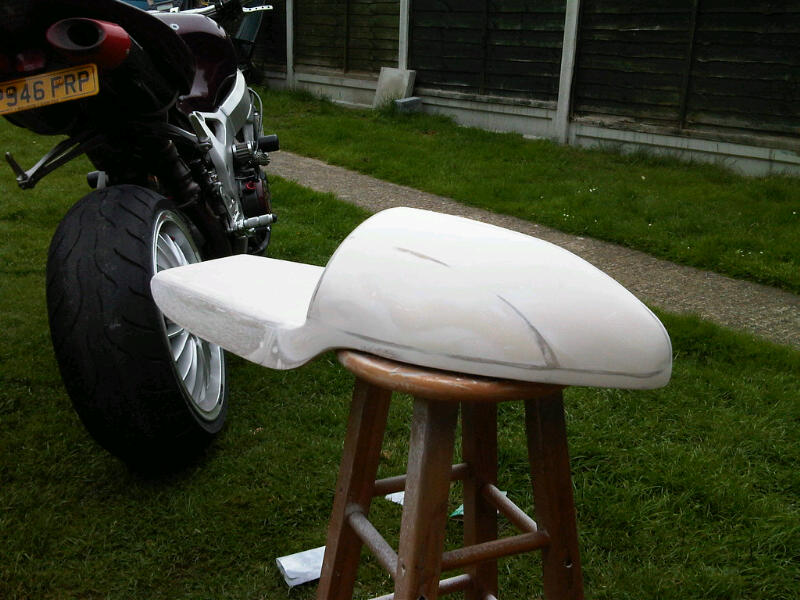
Well then, I'm not a 100% on the shape of the sides but I can always chop em.
Starting to look a bit more cafe now.
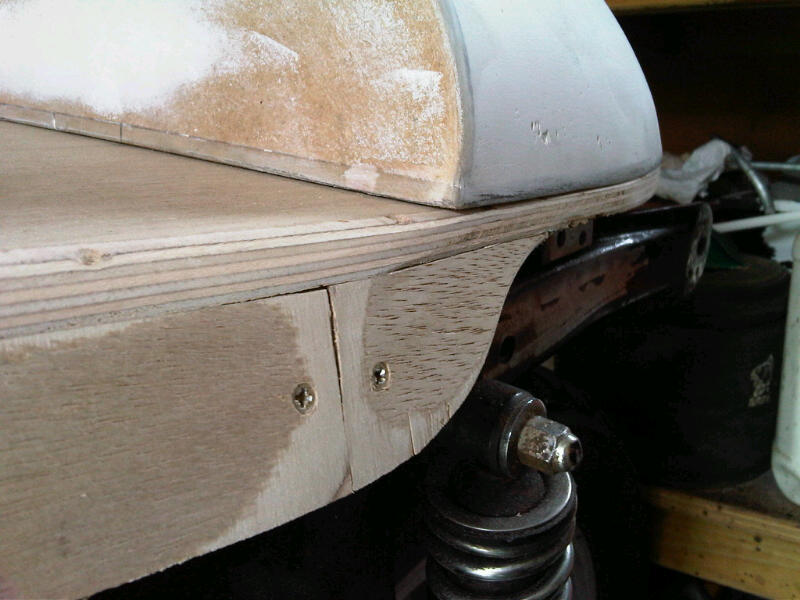
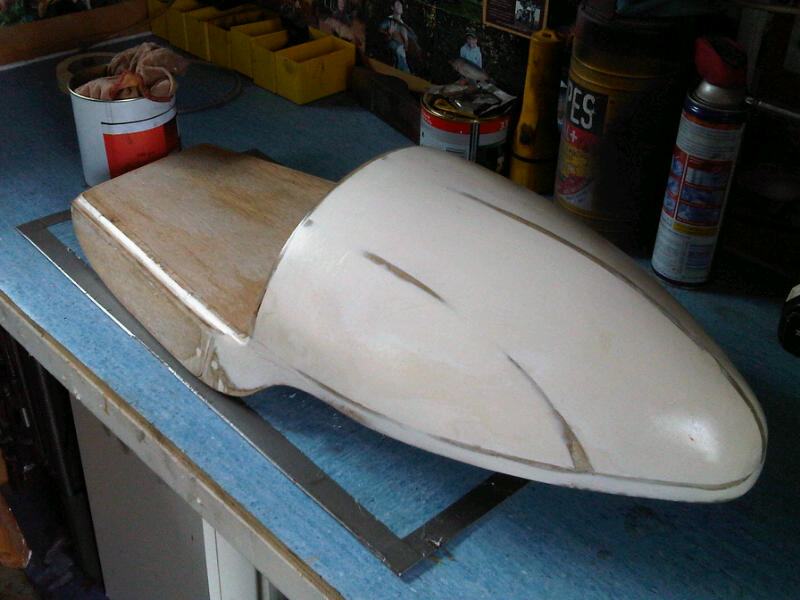
I got stuck in to shaping the front of the seat edges today after removing the fixing screws. The glue is really strong and I'm less likely to damage my blade by removing them.
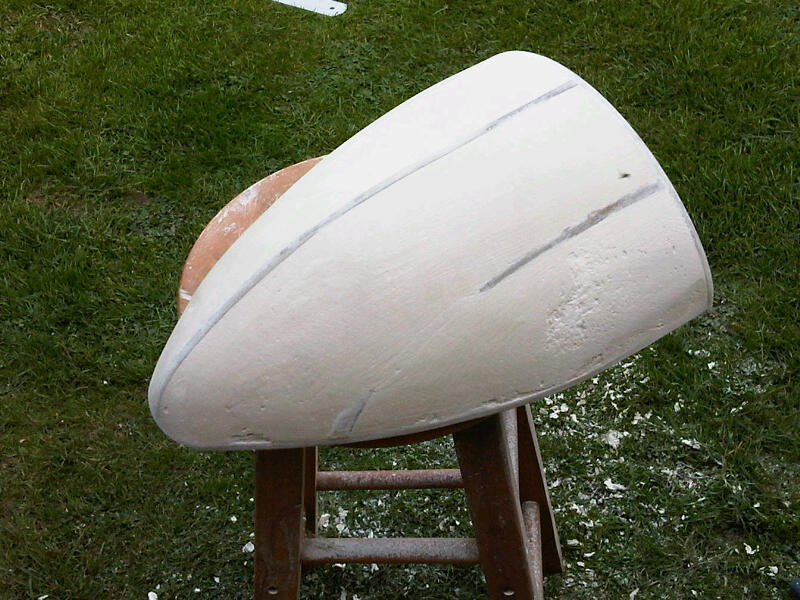
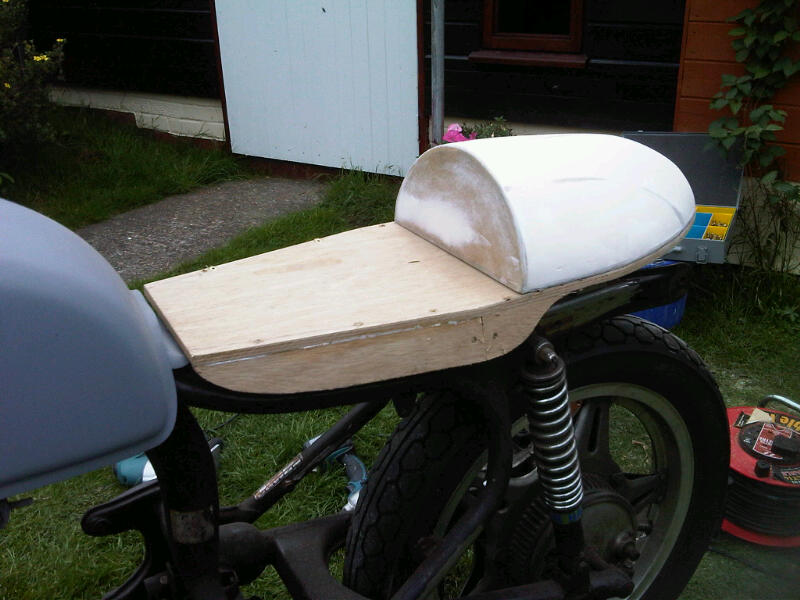
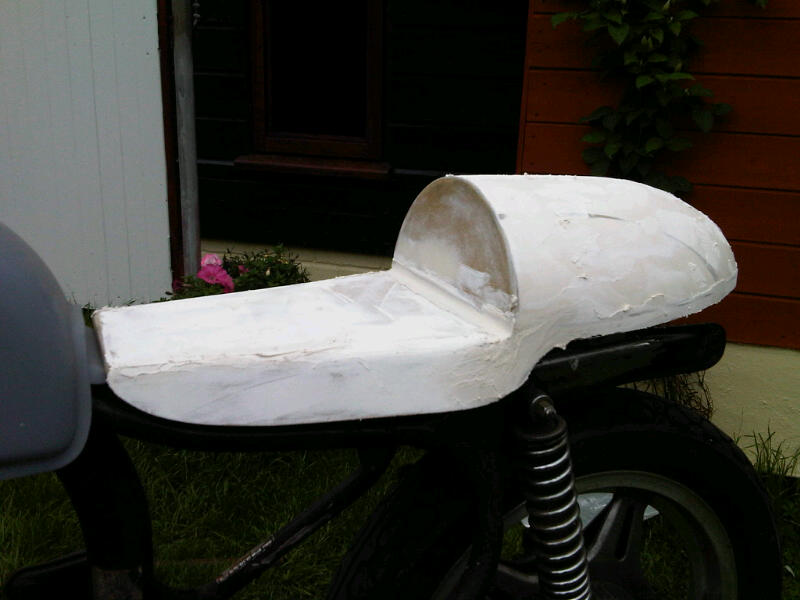
Its not that easy to see, but I sanded the base about 1mm smaller than the pod so I can fill it and get the two to blend
Its a bit easier to see how the infills taper out from the front of the bike.
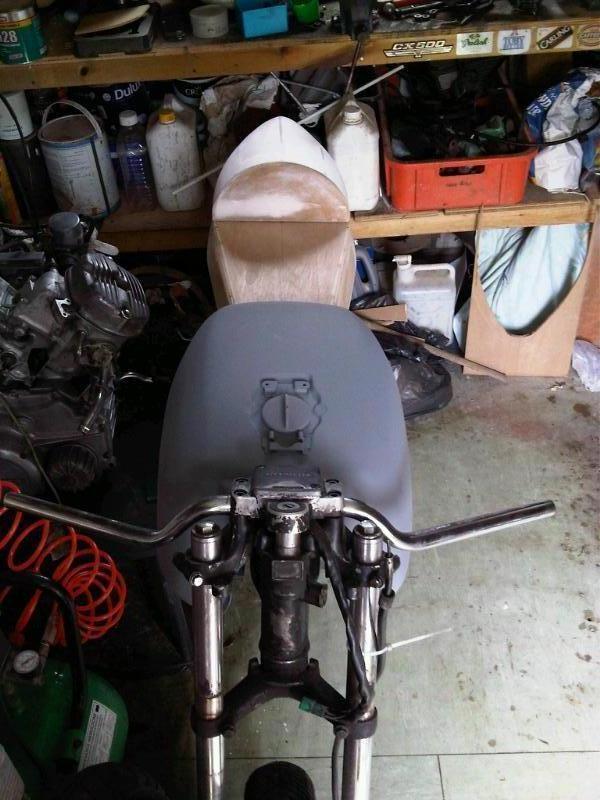
Bit more filling and it starts to come together.
I gave it a final sand and its done and its ready for 3 or 4 coats of pva then lots of waxing
I know I've posted lots of photos on this part of the seat, but I'm trying to convey the point that it is a process and if you cut corners or rush it then you may be dissapointed with the end result. I'm not saying mine is perfect, but it is at a point where any minor inperfections in the final casting can be got out with body filler.
This bit always bores the pants off me
Wax on........... Wax off.......... Wax on..........
The waxing is done, and left between coats to dry over night.
This is so it builds up layers of wax that will help the mould seperate from the original plug.
One last step before I can start laying on glass and that is to give it two coats of pva.
All pva is, is carpenters white wood glue. It forms a skin over the part and also aids seperation
Its a milky white now but when it dries should go clear and shiney.
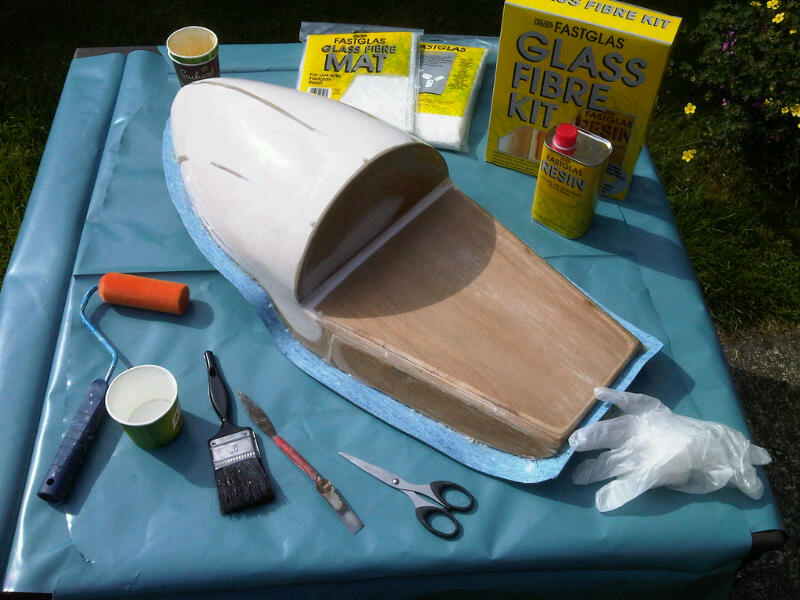
Next I'm gonna be laying on fiberglass to make my seat mould.
Right then,
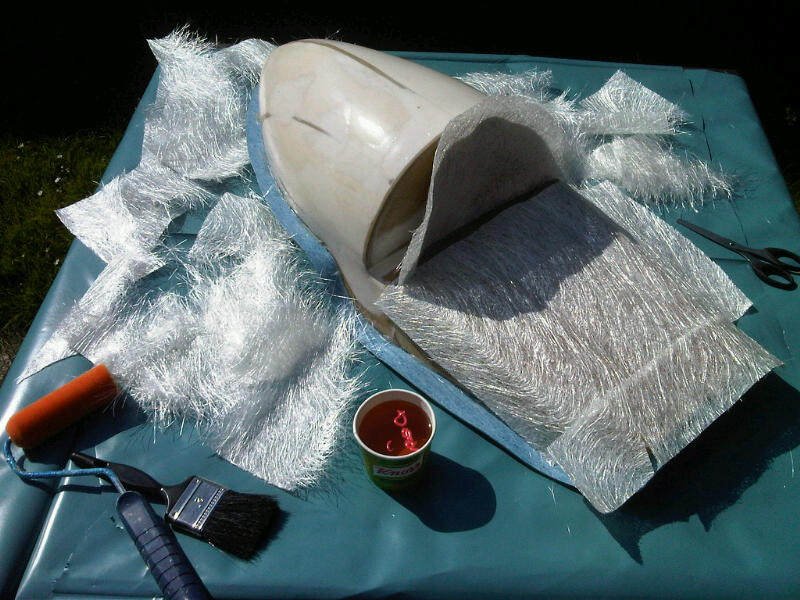
Fiberglass. The thing about fiberglassing is preperation. Make sure you have everything to hand, then either cut up or tear your matting to the size's you need. Remember big bits wont go round corners as easy as little bits and if you rip the edges they will overlap much better too
The guid on the can says 2cm of hardner to 100ml of resin. the can holds 500ml so 5cm of hardner for one of my paper cups should be about right as they hold around 250ml
I like to get a coat of resin on then add the matting and apply another coat of resin to wet it right in
The first layer is really important as that will be the outside face of the finish pod so take care to get it right. A few minor imperfections are no biggy as they can be got out with a little body filler
After that its just about getting the layers on. I'm gonna do a 3 layer seat so the mould needs to be 5 or six layers as it needs to be really ridiged.
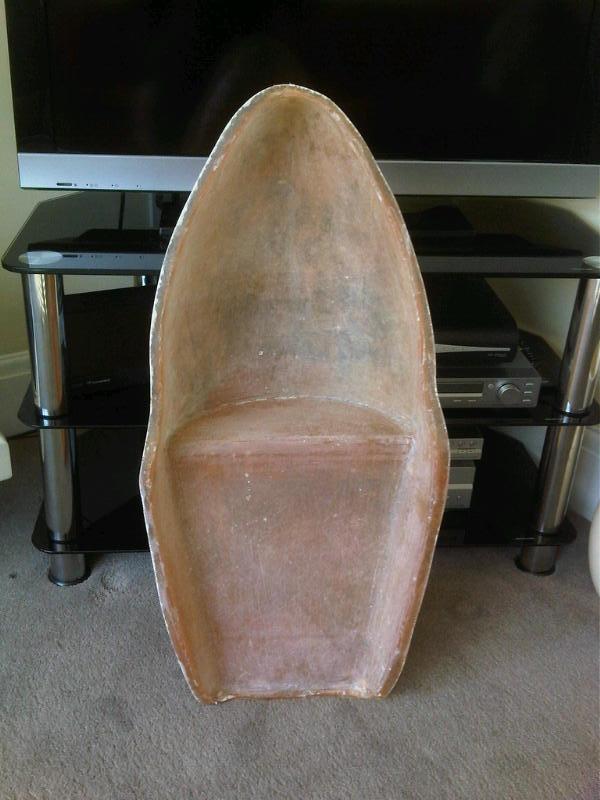
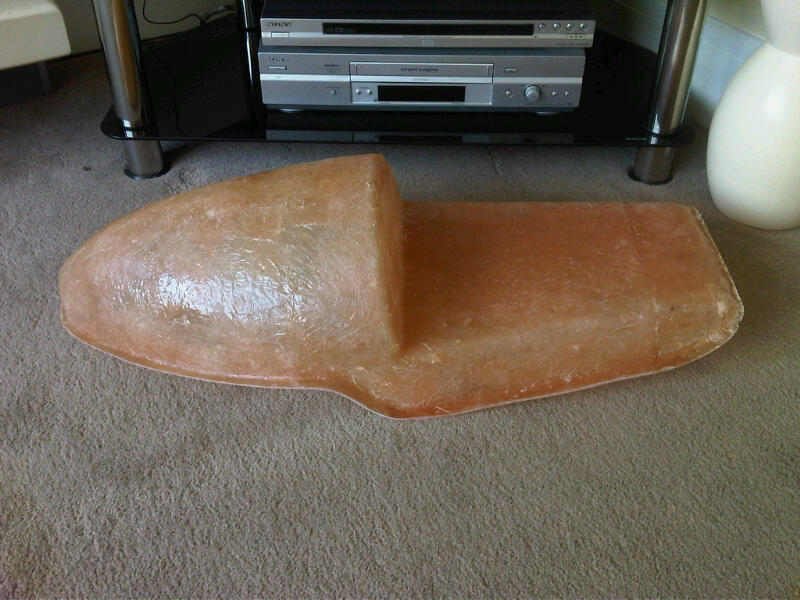
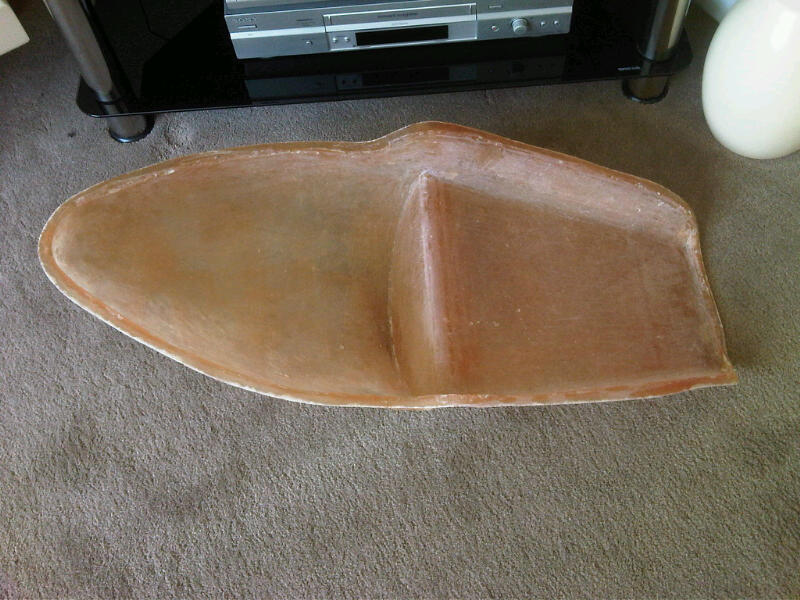
Now it can sit and cure for about 48 hours then i'll remove the plug.
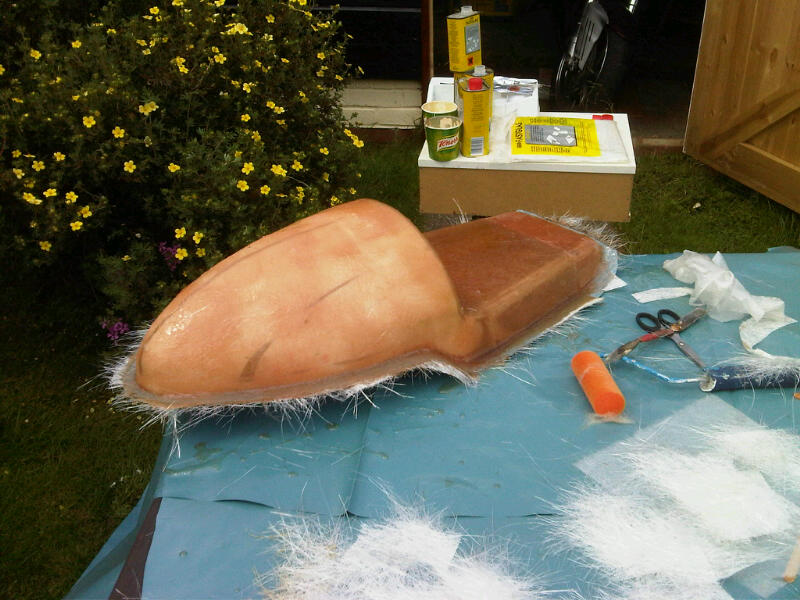
Well I got up this morning and decided to pop the mould off the plug
I cleaned it up and trimmmed the edges with a hacksaw blade in my jigsaw
There are a few small air bubbles on the inside, but I'll sort those out with a little body filler
First time I've attempted a seat, and so far its all gone to plan.