After some more sanding and shaping I'm almost ready for filler again, ignore the chunky geezer on the bike though; I wanted to see how it looked when I was on board!
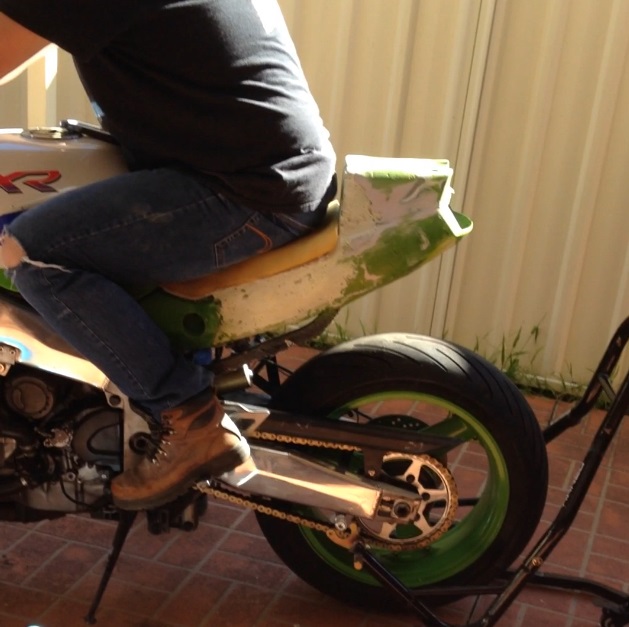


After some more sanding and shaping I'm almost ready for filler again, ignore the chunky geezer on the bike though; I wanted to see how it looked when I was on board!
Last edited by JimZXR; 31-08-2017 at 09:34 AM.

Good stuff mate. Love the short tail
Ladies and Gentelmen, take my advise. "Pull down your pants and slide on the ice."

Jim that look good mate. The lines continue from the tank to the tail and you have that factory stumpy look.
Looking forward to more progress bud. Keep up the good work.
Monster GSXR 7/11 RIP!
Raven R1 Demon.
K7 750 German Style (under construction)

Love it, looks, good mate
I like the look of that. Nice and stubby but still OEM "looking" to a degree
I've taken the subframe and tail off the frame so I don't get any filler or paint on the bike but also so I can lay it on it's side and brace it well for when I make the mould.
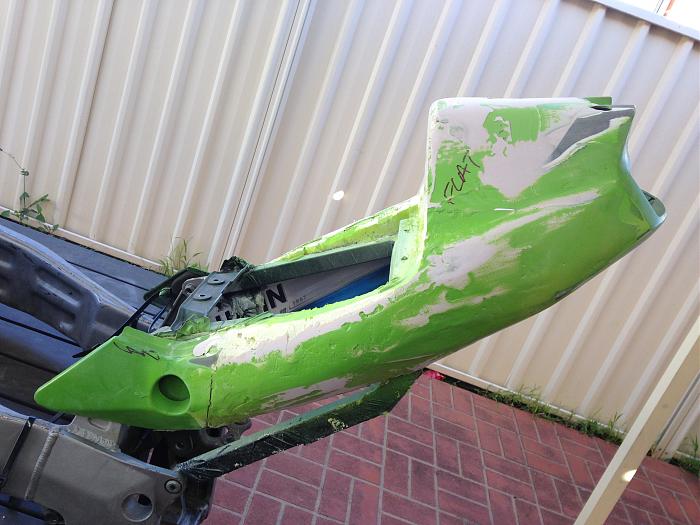
Already sanded down, painted and sanded some more so now I can see where is high, low, miss shaped and rough so I'm ready for more paint for guidance, light filler and loads more sanding!
Slow progress but trying to work on two fronts with mechanics too.
Is all the Bog etc adding a lot of weight?Originally Posted by JimZXR

better for wheelies.
more titanium than my bike
I was wondering if it was just going to be a plug for a mold in the end?
It's only a plug for the mould so although all of the big will be adding weight it'll all be coming off once the mould is made and hopefully it won't be twisting the shape but since I'm sanding most of it back I'm fairly confident it'll be good.
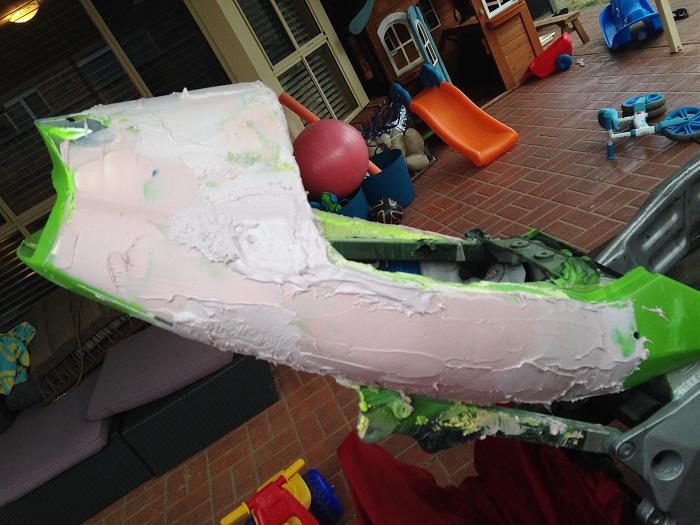
This is how it finished yesterday evening:
Last edited by JimZXR; 09-09-2017 at 07:05 PM.
And more filller....
Not sure but if we're counting, it's take/used/had;
2 rolls of electrical tape,
4 cans of spray foam,
3kg of filler,
5 layers of green paint,
1 tube of Epoxy,
6 40/80/120 grit sanding pads,
12 zip ties,
2 knuckles and almost 1 eye!
And I'm probably about 1/6 of the way done since I'm half way through the first stage of 3!
Remaking work list is still pretty huge:
Bare in mind all of the number are for grit profiles on machines until you get to 1000 so not leaving gouges like by hand. From now it'll be;
40 for heavy back and shaping then 80 for light blending.
Paint
More filler but lighter skim hopefully.
40 then 80 then 120.
High fill primer
240
Light spray High fill primer in places
400, 1000
Paint
1000
Clear, clear, clear
1500, 2000, cutting paste.
Wash
Wax, wax, wax
Make bracketry for mould
Mould 1 side and allow to cure
Install locating fittings for bolting back together
Turn over and make second side
Allow to cure
Spray inside of plug with acetone to melt foam
Separate mould from remaining filler and paint of plug
Break/cut/spray all remaining plug off subframe
Remove tape and protection off subframe then polish
Make fibreglass copy of seat unit from mould and allow to cure
Reinstall subframe to bike
Test fit seat unit
Stand back and admire, probably cry a little, sink a beer then get back on with the rest of the bike!
Wow Jim you are so dedicated to this tail section now there is no going back! Love the write up and all the progress. Keep it up champ you'll get it.
Monster GSXR 7/11 RIP!
Raven R1 Demon.
K7 750 German Style (under construction)
Mate, I'm so deep into it now the only way out is to go deeper!
I'm gonna be lost when it come to both making the mould and making the final product so don't be surprised if I'm sending up flares for your help!
So after tonight's episode efforts I've been reminded of how much of an unforgiving beast filler can be when it's way too think!
After 40 minutes with 40 grit I've barely scratched it so it's back to the bastard file and other assorted power tools for tomorrow to help reshape the tail unit once again.
I'm not beaten but throwing in the towel for tonight.
I will usually try and even out my fillers while they are still slightly "green" (not quite fully cured - maybe 80-90%). But I find that smoothing the highs is far easier with an open face rasp
Should make quick work of most all fillers and doesn't get clogged because it is so coarse
 Posting Permissions

 Reply With Quote