I did it on the wretched, it may touch the rear tyre on some corners and rub off some paint on the plate so no good if you are thinking about personalising plates.
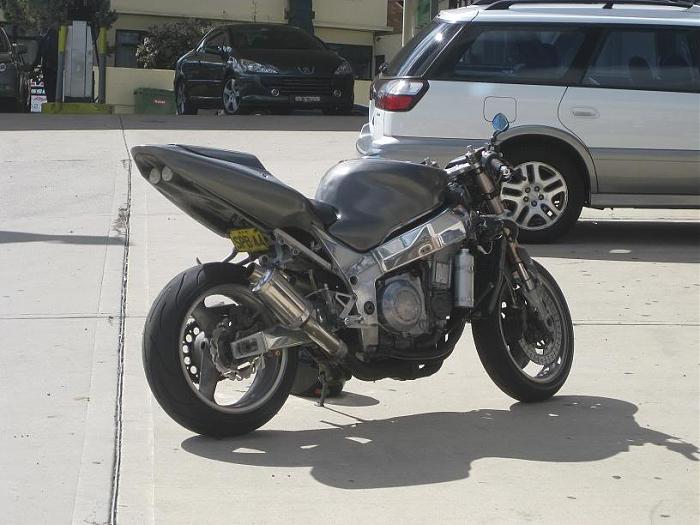


I did it on the wretched, it may touch the rear tyre on some corners and rub off some paint on the plate so no good if you are thinking about personalising plates.
Last edited by rod185651; 23-06-2017 at 07:51 PM.

like the photoshop abortion mate, will look awesome ! a nice tweak on the original while keeping a bit of it's heritage there too

That was kind the idea; wanted to have something more like a factory feel while still being mine so I've chopped a few of the plastic pars I want to copy and have them bolted on so I can use them as a start/end point and fill in the gaps between how I see fit
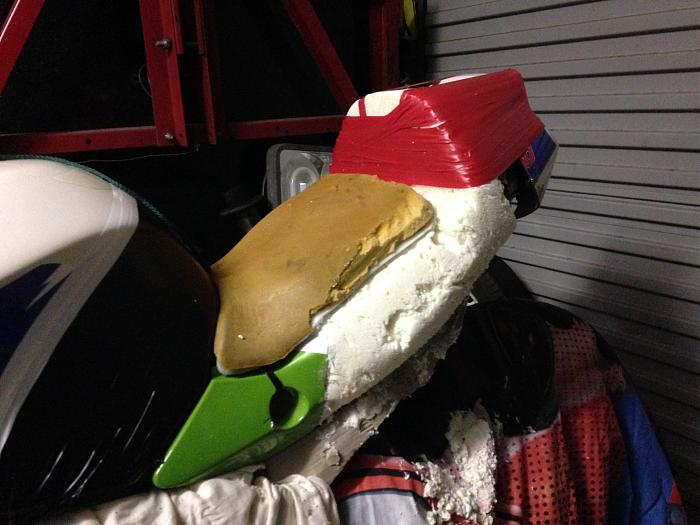
Did a bit of sanding and shaping tonight and now have a rough shape to work with. I've used some more of the original plastics to give the rear the same shape as OEM so I can concentrate on making the custom pieces work right.
Hand saw, saw knife, few spare carving knives from the kitchen and plenty of 240 grit sheets are making easy work of it.
Obviously there's plenty of very large gaps to fill but for a start I'm happy.
I've put some red PVC tape over the largest gap on the side to get an idea of the finished shape and how much I'll need to build or shave and it's not looking too bad.

Can I suggest something that will make your life a lot easier and speed the whole process up for you? Instead of using that expanding spray foam and then having to fill loads of holes which will literally do your head in when you come to the finishing stage, why not visit a foam / polystyrene manufacturing workshop and see if they have any large HD polystyrene off-cut blocks they can sell you. This is how I, and almost everyone else I know have always done it, as HD foam will sand back to a solid final finish ready to create your mold. Here's an example of somewhere to try:
http://www.dctech.com.au/modelling-foam/
Bunnings has sheets of 30mm and 50mm thick polystyrene foam for insulation now - buy, laminate with hot glue.
https://www.bunnings.com.au/knauf-in...board_p0811027
https://www.bunnings.com.au/knauf-in...board_p0811028
Lay up glass over it, dissolve foam out with acetone/petrol.
Last edited by GammaBoy; 03-07-2017 at 09:54 AM.
I had considered using foam blocks but the shape of the subframe I am working with made it difficult to apply them properly.
Also I've already laid down the second layer of expanding foam so am probably too far committed now.
No problem mate. Still keen to see how it turns out. Cheers Jim.

Wow Jim, this is a fair lot of filler foam you have there. I look forward to seeing this done myself.
I actual don't mind this stuff. Not that bad to work with and can be shaped easy enough.
If I had however found that foam board I would have went that road, maybe next time (custom front guard)
Monster GSXR 7/11 RIP!
Raven R1 Demon.
K7 750 German Style (under construction)
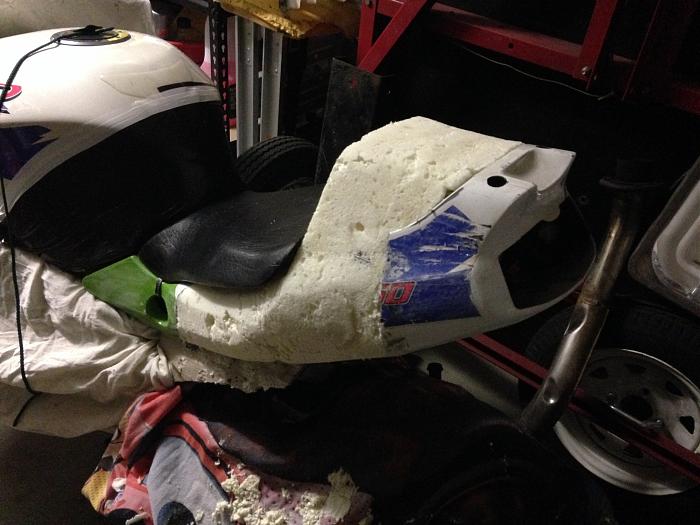
I didn't a little more shaping last night and finally got the basic outlines I want now just need to figure out how big will take to the shape then try to sand it all down flat but may have a few option available yet.
So I've finally got in the garage again to do a little more sanding and shaping and I'm now happy with the final shape.
Tried a small cut off piece to see if acrylic spray paint would melt it and so far it looks good so I may spray the tail green before I lay some filler down so I can reference how far down I'm sanding.

Like the shape mate. Looks good.
Ladies and Gentelmen, take my advise. "Pull down your pants and slide on the ice."
Yep. A long way to go yet, but keen to see how it shapes up. Thanks for sharing Jim.
That's a very interesting shape and looking good Jim. stock fighter style will be pretty cool and different.
Monster GSXR 7/11 RIP!
Raven R1 Demon.
K7 750 German Style (under construction)
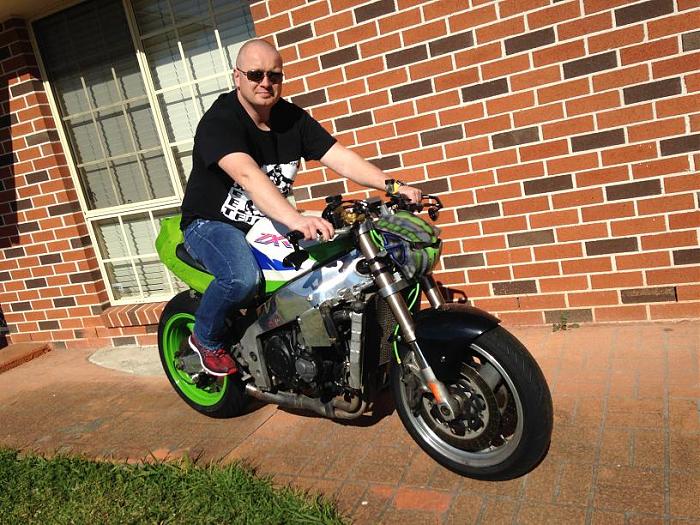
Got the shape somewhere near what I wanted then laid down some paint to get an idea of the shape against the rest of the bike and have to say I'm pretty happy!
It look snothing like these photos now as it's covered in filler waiting for sanding but here's an idea of where I am...
Looking good mate
Noice. Thata cool mate
Ladies and Gentelmen, take my advise. "Pull down your pants and slide on the ice."
 Posting Permissions

 Reply With Quote