Page 1 of 8 123 ... LastLast
Results 1 to 20 of 147

Thread: Harris rebuild on Isle Of Harris

  1. #1
    Weekend Warrior
    Join Date
    May 2010
    Location
    Isle Of Harris, Scotland, United Kingdom.
    Posts
    304

    Harris rebuild on Isle Of Harris

    Well the project train keeps on rolling. Keeps me mentally sane-ish having a project always on the go n distresses me.

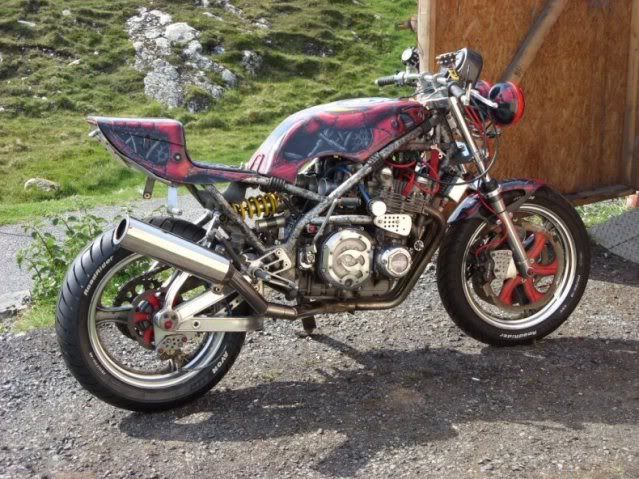
    Harris`s turn at mo. Had her 13-14 years now and been evolving along the way really. Was my daily transport for many years and been on touring holidays, etc 2-up with luggage. Been everywhere really in all weathers. Few bits been updated over the years as they’ve worn out or I`ve come across them cheap, etc.

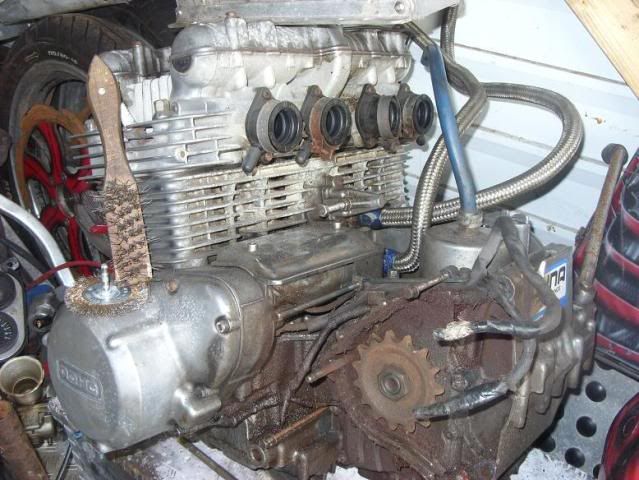
    Z1B lump, 998cc overbore, raised compression, welded/balanced crank, new/old stock head with light polishing, stainless valves, kent cams, 29mm carbs, etc, etc. Pulls like a train for an old girl. Enough grunt to keep me happy anyway. Love this bike to bits n probably be buried with it. Lol.

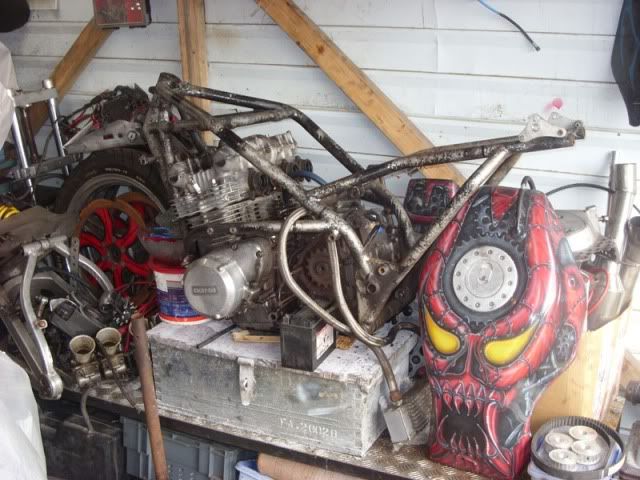
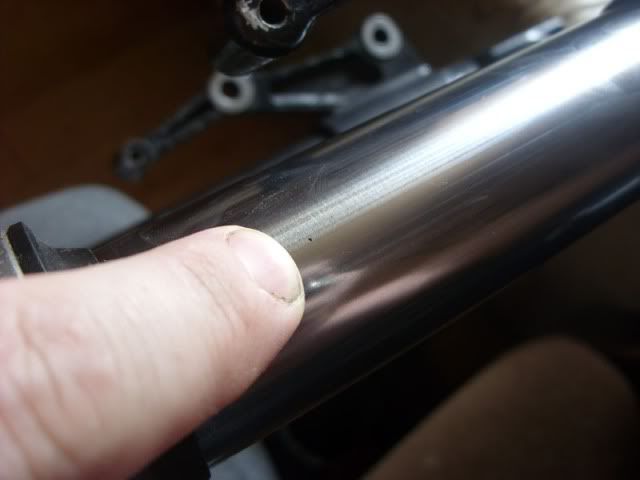
    Before strip down. Looks ok but was a bit rough close up n a lot of bits I wasn’t happy with finish of, etc. Looked like a rat-bike compared to my tubby bandit so time to pimp it up a bit. :-


    Drove it onto bike bench 2 weeks or so ago n started pulling it apart. Few rusty bolts n usual crap with an all-weather bike. Got to this stage and couldn’t get last engine bolt out.:-


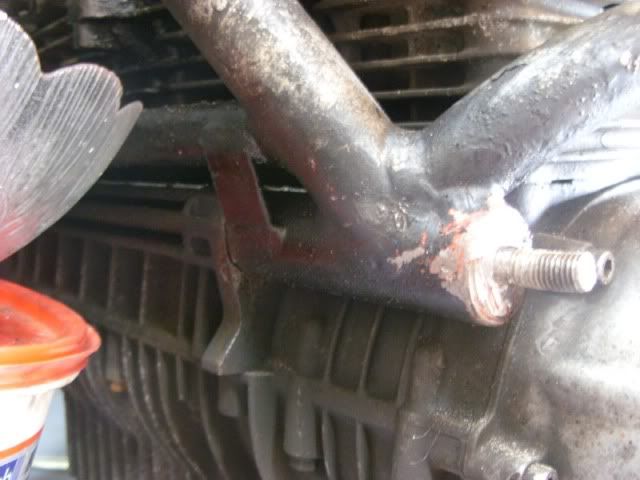
    2` stainless bolt passing through (2x) 4” alloy frame spacers was stuck solid even though copper greased it to death last time it was out years back.:-


    Got a hacksaw blade into gap between engine and frame and holding blade in my hand I could wiggle it up n down ½” at a time only. 2 evenings were spent out there on my knees sawing away at it. Lol. Chopped through it and then with a sledge hammer in one hand and a drift in the other I spent 3 hours hammering away at the 2 halves till eventually came out. Feckin solid! :-


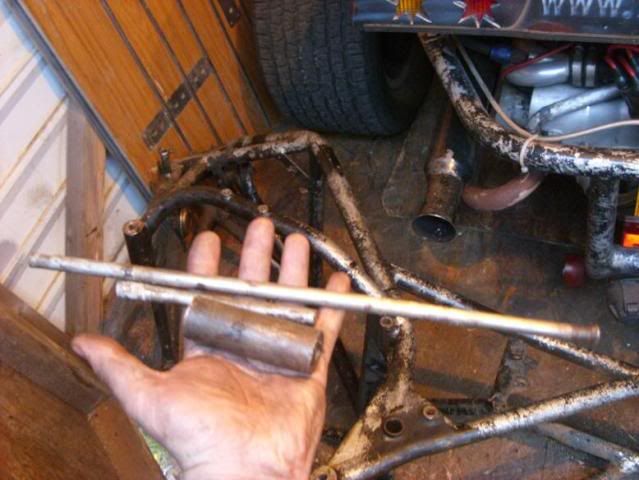
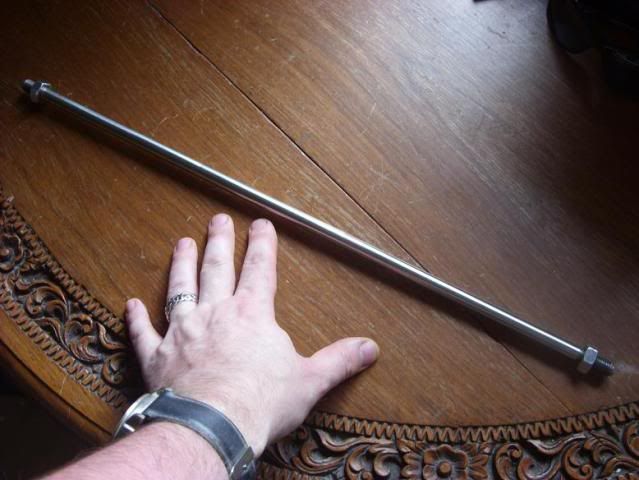
    My mate Emoe from Haydencycles knocked me up a high grade stainless replacement for when goes back together. Bike wont be seeing same winter weather nowadays so should never get as bad again.:-


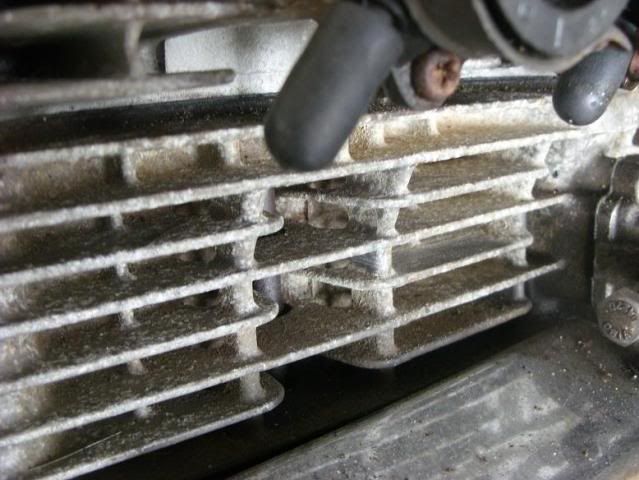
    A lot of years of bare alloy engine and living 50` from sea and the engine was a mess in areas I couldn’t reach to clean normally. :-


    Solid crud too. Built my own soda blaster and wouldn’t even touch it. Tried spraygun cleaner (100% solvent) and didn’t touch it. Only thing that shifts stuff between fins was a small screwdriver and lots of hours. Degreased whole lump to start with anyway. :-


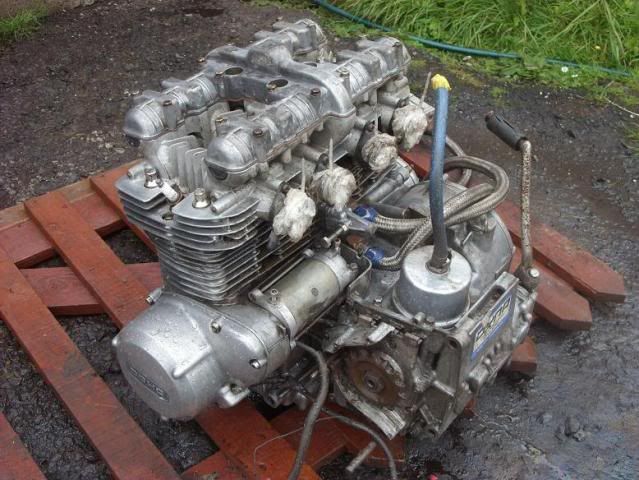
    Got 2 cans of Mr Muscle oven cleaner sitting here and buying a powerwasher tomorrow (which I needed anyway) so should be able to get it cleaned up and sprayed shortly.

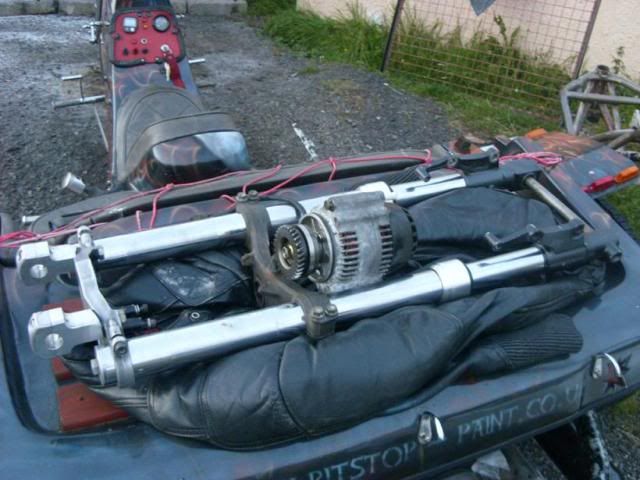
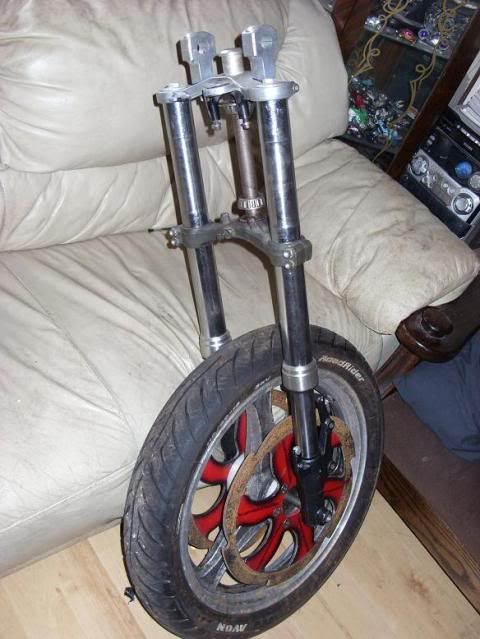
    Was over mainland other weekend on my trike getting its mot n doing a bike show. Came back with these parts for it for free off some good mates. :-


    Old forks were bin fodder. Top halves were pitted to death, bottoms had cracks around seals, inside bushes, etc shot too. Useless yet bike still handled really well on these twisty mountain tracks.

    Off a TZR250 reverse cylinder import model. Wasn’t sure about them seeing as theyre off a smaller bike but theyre just as big as gsxr ones and make my 80`s original ones look like toothpicks. Lol. Twice as stiff too so should be fine. Harris is a lightweight bike anyway so these should be a vast improvement over old ones. Same length too which is a bonus.

    Pitting on lowers is about 5 spots this size. :-


    Cant feel them and need a magnifying glass to find em so Im happy. Good change of seals n oil, etc and should be fine. Free is my favourite price.

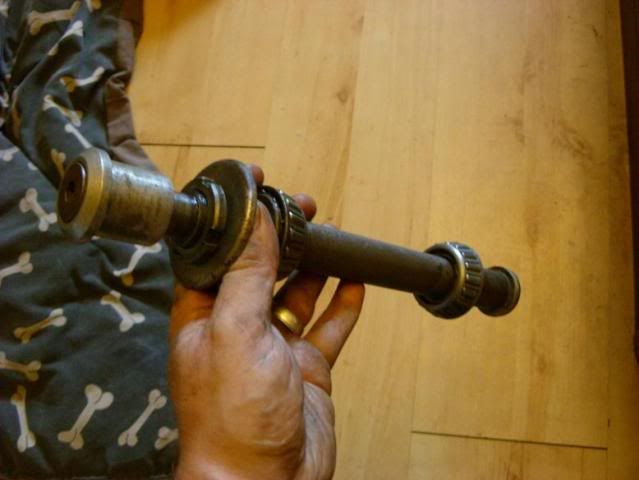
    Wheel spindle is off something else but fits threads. Needs a spacer one end as slack in fork leg end.:-


    Have some nice billet risers already on too. Was planning on clip-ons but with my t-rex stubby arms straight bars are much better option. Probably make some billety ones same as my bandit for it as really like the look/feel of them.:-


    Drifted yoke stem out of old yokes yesterday and brought forks/wheel/spindle in house to get a proper measure up. :-


    By pure chance the wheel spindle fits perfectly in wheel bearings which is a bonus. :-


    Bit more wheel/disc clearance than old forks too.:-


    Measured up for spacers for top/bottom yokes, fork leg end and wheel spacers. Got a mate sending me some bar scraps up to make them out of. Got a wee lathe in shed so should be able to turn them all up myself.

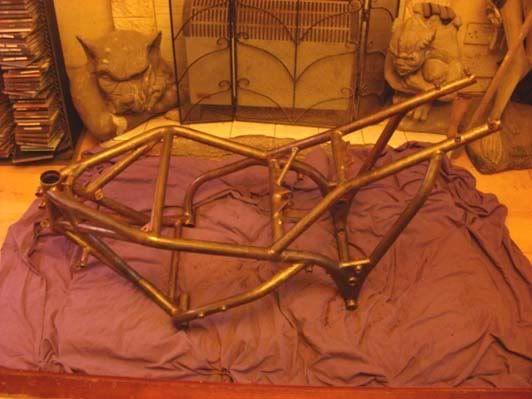
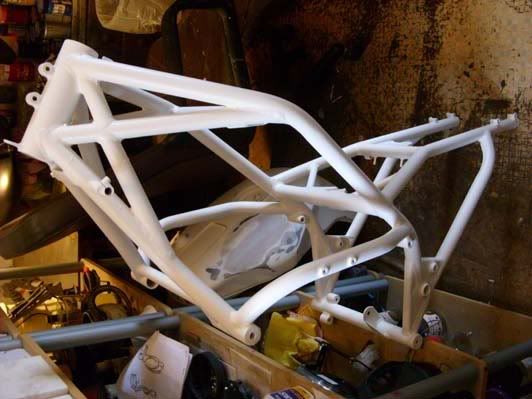
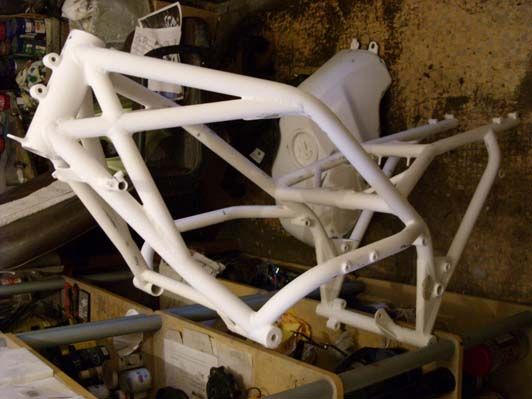
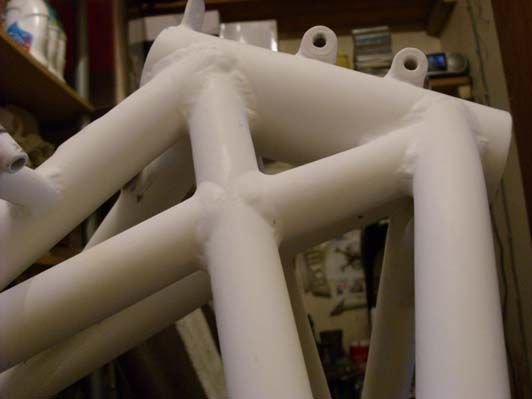
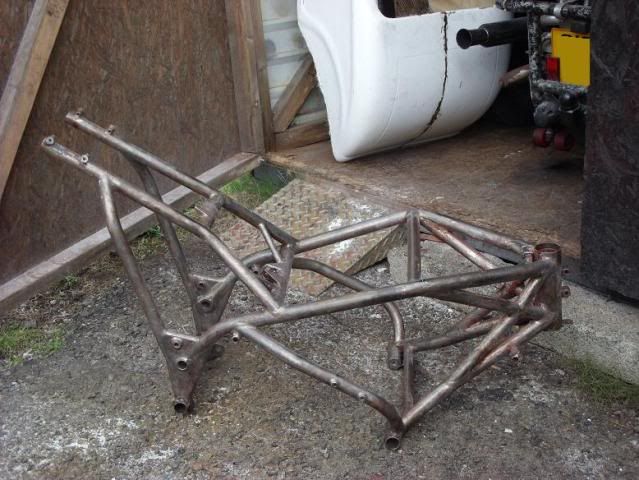
    My wife spent several days with wire brush on the grinder/drill buzzing back the frame. No blasters or anything on my island. Everythings a PITA to do up here as have to do everything yourself. About 10 layers of smoothrite and aerosol paints, etc. Just chopped off the rusted in bolts and drilled/ re-tapped few holes, etc so ready to go.:-


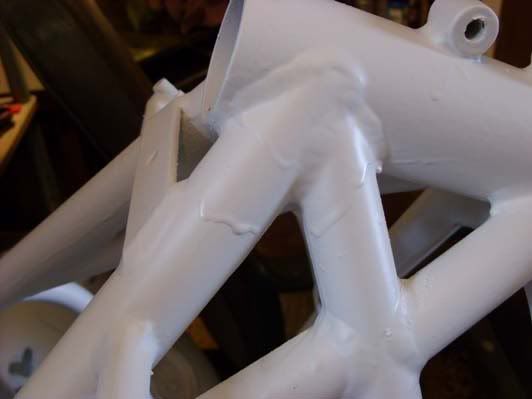
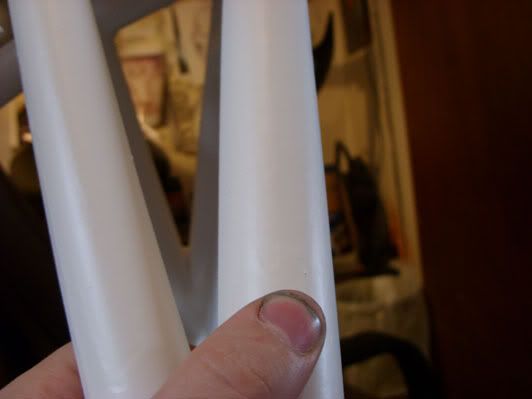
    Underneath paint is flaky nickel coating with a fair texture to it. Painted over it several times over the years with no problems so not worried about it. Main thing is getting a smooth finish this time as has always looked a bit crap in brush painted finish to hide the roughness and edges of plating. I spray for a living these days though so do it properly this time. Several layers of high build primer and smear of filler if needs be to smooth out roughest edges and should come up smooth. Planning on metalflake finish anyway so any small flaws will be lost under good 1mm+ of flake. lol

    Got frame in sitting room this afternoon scraping n chipping out last of paint from corners and recesses. Thankfully my wife doesn’t mind bike bits everywhere. lol

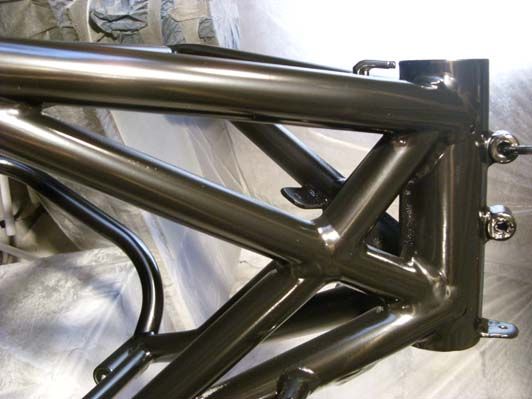
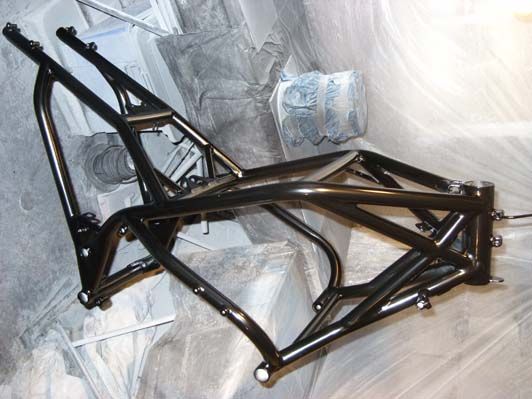
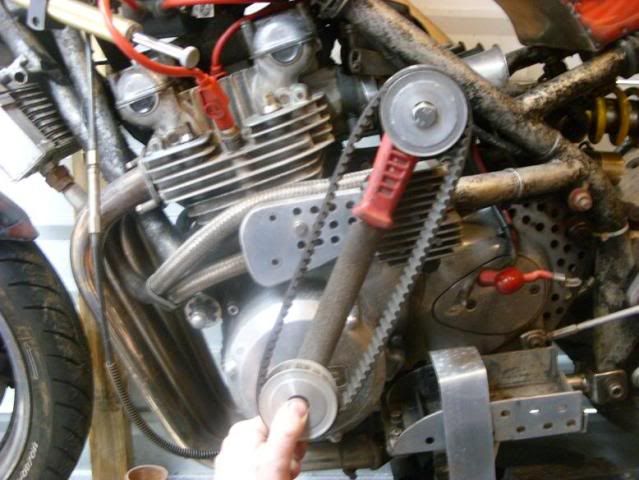
    General plan is keep the same general look as love the way it is, just finish everything better. Go through each piece and re-work it in same way as I did with tubby bandit really. Remake most of alloy parts to a better /neater finish. Engine silver with black gloss cases. Homemade belt driven alternator up one side using some toothed belts/alloy gears I had sitting about. Sorta like this.:-


    Tuck that bandit alternator I picked up into gap by carbs.:-


    A matching setup on other side of bike with a belt driven mag looking setup (more to come on that). Carbon fibre guards with of some sort for them both. Few carbon fibre detailing pieces here n there.

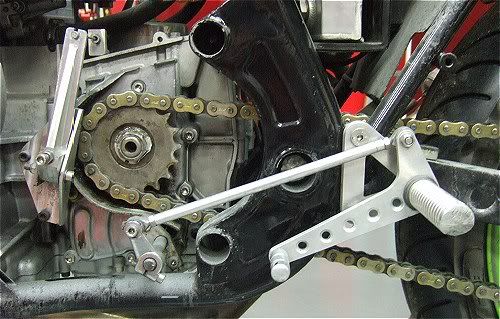
    Clutch casing on mine is cracked n knackered so going for a 80`s endurance style of lifter setup as love the look of them.:-


    General red/black/silver colour scheme and detailed to death with lots of home-made parts as Im a tight-ass womble. Lol. Paintwork wise I`ve got paintscheme worked out in my head already. Lol. While away before get to that stage though. Try push the boat out n do something really wild on it.

    So yeah 2 weeks in and updates to follow when get summit done really. Not in any huge rush as want the end result right. Doing an hour a day or so, so things will keep chugging along.

  2. #2
    Bloke with the Pics Gitzy's Avatar
    Join Date
    Apr 2006
    Location
    OVER HERE
    Posts
    7,962
    Blog Entries
    3
    Oooh I'm looking forward to this Jon, always entertaining you are..

  3. #3
    Tyre destroying, mad bastard menace
    Join Date
    Sep 2010
    Location
    Gixerville....
    Posts
    2,354
    The level of detail on the bandit was mind blowing mate. Can't wait to see what becomes of this build.

  4. #4
    Weekend Warrior
    Join Date
    May 2010
    Location
    Isle Of Harris, Scotland, United Kingdom.
    Posts
    304
    Quote Originally Posted by Gitzy View Post
    Oooh I'm looking forward to this Jon, always entertaining you are..
    By always entertaining you mean slightly deranged. Hopefully I`ll do an alright job bud.

  5. #5
    Weekend Warrior
    Join Date
    May 2010
    Location
    Isle Of Harris, Scotland, United Kingdom.
    Posts
    304
    Quote Originally Posted by K6Thou View Post
    The level of detail on the bandit was mind blowing mate. Can't wait to see what becomes of this build.
    Cheers bud. Some folk liked it, n some hated it with a passion. lol. Usual way though. I just build what makes me happy n folk make theyre own verdicts, etc. Hopefully my harris turns out well anyway. Do the best I can with what Ive got and fingers crossed. Take my time and do the same as with bandit really. Work through each peice, etc.

  6. #6
    Tyre destroying, mad bastard menace
    Join Date
    Feb 2008
    Location
    Melbourne, , Australia.
    Posts
    1,063
    Likewise your Bandit build was pretty bloody incredible especially considering where you live WTF. I used to live in Tongue on the far North coast so I know all about remote and shitty Scottish weather and twisty Highlands and Islands roads.Going to watch this one with interest

  7. #7
    ASF Premium Full Member El_Hefty's Avatar
    Join Date
    Mar 2009
    Location
    South Sandwich Islands.
    Posts
    1,460
    Blog Entries
    1
    hey do us a favour and show us some pics of your little island would ya.

    Yep ill echo the others will be watching with interest
    I can handle pain until it hurts.

  8. #8
    ASF Premium Full Member
    Join Date
    Feb 2007
    Location
    Australia
    Posts
    2,352
    I have the same model and owned mine since 1983 and doing the same type of resto, good luck.

    I originally used RGV USD and worked really well (same as 900 Ducati!) now run R1 forks with Radials, thread on here somewhere!

    Look forward to watching the transformation.

  9. #9
    Bloke with the stick Gix11's Avatar
    Join Date
    Jun 2003
    Location
    Gold Coast, Queensland, Australia
    Posts
    17,574
    Blog Entries
    34
    Yep, looking forward to this one as well mate. Everybody has said what i was going to say.

  10. #10
    Weekend Warrior
    Join Date
    May 2010
    Location
    Isle Of Harris, Scotland, United Kingdom.
    Posts
    304
    Quote Originally Posted by stiffsimon View Post
    Likewise your Bandit build was pretty bloody incredible especially considering where you live WTF. I used to live in Tongue on the far North coast so I know all about remote and shitty Scottish weather and twisty Highlands and Islands roads.Going to watch this one with interest
    Been through Tongue bud. Been most places tbh. lol. Love touring round scotland on bikes when get a chance. Yeah its not easy here as everythings a challenge, but get used to it n soldier on.

    Keep getting random folk turning up at doorstep to nosey at bandit as heard about it, etc. Bit weird but gets me knowing more bikers local-ish. lol

  11. #11
    Weekend Warrior
    Join Date
    May 2010
    Location
    Isle Of Harris, Scotland, United Kingdom.
    Posts
    304
    Quote Originally Posted by El_Hefty View Post
    hey do us a favour and show us some pics of your little island would ya.

    Yep ill echo the others will be watching with interest
    Not got many pics I can find on pc, but heres view from my doorstep in winter. Thats as cleared n gritted as it gets. lol. :-


    Most of round my house is like this really. Water, rocks, sheep n not a lot else.:-


    Where I live. Joined to larger Lewis/Harris Island by bridge. :-


    Real contrast up here. Small island, mountains and loads of empty beaches like this close by too. :-


    Good few standing stone circles further up island. Old churches, etc, etc. :-


    I like it here. Not easy living but quiet as heck n next to zero crime so great for kids, etc.

  12. #12
    Weekend Warrior
    Join Date
    May 2010
    Location
    Isle Of Harris, Scotland, United Kingdom.
    Posts
    304
    Quote Originally Posted by Hagarr View Post
    I have the same model and owned mine since 1983 and doing the same type of resto, good luck.

    I originally used RGV USD and worked really well (same as 900 Ducati!) now run R1 forks with Radials, thread on here somewhere!

    Look forward to watching the transformation.
    Now thats usefull info bud. These forks are comparable with the RGV ones tbh. Pretty impressed with them so far tbh and were free so grabbed em. lol. Harris isnt that heavy really even with big lump in it so should be a lot better than the buggered 80`s ones.

  13. #13
    ASF Depleted Uranium Member Large's Avatar
    Join Date
    Jan 2006
    Location
    , , Kazakhstan.
    Posts
    9,379
    why did i get an image of the Wicker Man flash into my head.

  14. #14
    ASF Standard Full Member Bob's Avatar
    Join Date
    Nov 2008
    Location
    Mt Cotton, Qld, Australia.
    Posts
    2,343
    This is looking like a great build.
    Ladies and Gentelmen, take my advise. "Pull down your pants and slide on the ice."

  15. #15
    Tyre destroying, mad bastard menace
    Join Date
    Feb 2008
    Location
    Melbourne, , Australia.
    Posts
    1,063
    Not got many pics I can find on pc, but heres view from my doorstep in winter. Thats as cleared n gritted as it gets. lol. :-

    LOL I don't think many people know what you mean by gritted

  16. #16
    ASF Premium Full Member El_Hefty's Avatar
    Join Date
    Mar 2009
    Location
    South Sandwich Islands.
    Posts
    1,460
    Blog Entries
    1
    thanks for the pics great part of the world but as you say hard.

    look forward to more build pics as time allows.
    I can handle pain until it hurts.

  17. #17
    Weekend Warrior
    Join Date
    May 2010
    Location
    Isle Of Harris, Scotland, United Kingdom.
    Posts
    304
    My wife spent 2 days or so with wire brushes on grinder and drill taking off ½” of built up aerosol and hammerite paint off frame, along with rust patches, etc. I spent a whole week of evenings scraping into corners with a knife and screwdriver to get it spotless. Lot of hours, but no blasters or anything on my island. Finally got it to bare metal and the old nickel plating which is stuck solid. Anything loose came off with grinder and steel brush wheel. :-


    Coated it all in Kurust treatment to be sure rust is neutralized. Built up several coats of high build 2K primer today in between work stuff. :-


    Kept throwing it on till started to sag/run, etc. Wasn’t being fussy though tbh as only using primer as a leveler/filler of sorts to get rid of edges of nickel plating vs. steel tube. :-


    Close up though and the ridges are very feint and leveling out nicely.


    Going to sit and sand it back next few evenings in sitting room. Try level out things a bit more and remove overspray dust, etc. Reckon if repeat this process a few times I`ll get the tubes pretty smooth. Concentrating on outside visible faces more really. Going for metalflake finish anyway so if can get it reasonably smooth then flake will cover anything small tbh.

    Ordering work paint next couple days so I`ll get some etch primer too for engine and can get that blasted n painted soon hopefully. Friggin DIY is eating all spare time at mo, but good to get some housey shit done too.

  18. #18
    Weekend Warrior
    Join Date
    May 2010
    Location
    Isle Of Harris, Scotland, United Kingdom.
    Posts
    304
    Built some fences this weekend and spent good 10 hours or so in sitting room sanding back frame and getting tubes whipped into shape. :-


    Taken sodding ages, but close up the spars are tubular and smooth. You`d never know just how rough it was before now. :-


    Another couple coats of primer (lighter this time) and a light sand and stick some black basecoat on and see where we`re up to. Make the decision as to whether going with original gloss black plan, or sticking to metalflake plan if theres still visable roughness. Decisions, decisions. Getting somewhere slowly. Knew the frame/engine refurb were going to eat serious hours though.

  19. #19
    Weekend Warrior
    Join Date
    May 2010
    Location
    Isle Of Harris, Scotland, United Kingdom.
    Posts
    304
    Getting bit sick of frame refurb now. Lol. Been bout 30-40 hours all-in so far. Put couple of coats of black basecoat on tonight though and the hard works sure as hell paid off. Nice smooth frame rails, no flaky nickel plating ridges, no rust, no dings, just proper looking! No clearcoat on it yet, just basecoat. :-


    Few wee nibs to sand out n touch up, etc but looks good. Was planning on metalflake over the top, but seeing the tubes turning out so good Im tempted to revert to my original plan n go gloss black frame. Easier for touch-ups down the line from stone chips/rust, etc. too.

  20. #20
    Tyre destroying, mad bastard menace
    Join Date
    Dec 2006
    Location
    Brisvegas
    Posts
    4,914
    That frame has come up great. Seems like all those hours are paying off.

Page 1 of 8 123 ... LastLast

Posting Permissions

  • You may not post new threads
  • You may not post replies
  • You may not post attachments
  • You may not edit your posts
  •