Nice. So the wiring is all sorted then (according to the video)? Oh, and you mentioned paint, what's it going to be?


Nice. So the wiring is all sorted then (according to the video)? Oh, and you mentioned paint, what's it going to be?
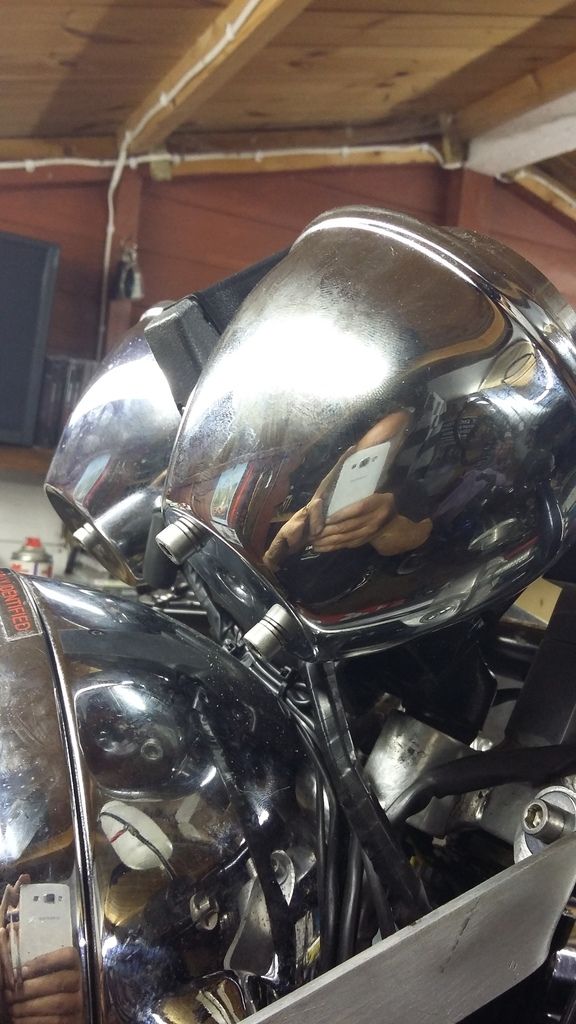
love the cut down breather, much cool compered to std or normal aftermarket :-)
A couple of amendments to the wiring - a connector so that the fuel pump can be quickly connected / disconnected (as I don't know yet whether I'll be using it or not), and the neutral switch wired in (instead of the oil temp being wired in as a neutral...) - but otherwise, yes, all done (I hope). And paint will be on the body panels and tank, and will be two pack... all paint, no stickers or badges.
www.flat-out.com
Oh, and I've had it pointed out to me that the 'one-off' breather is just about exactly the same as a standard Z650 one! Which actually works in my favour, given that the end result is going to look like the Z650 that (at it's heart) it really is...
www.flat-out.com
Made a (slightly) adjustable steering stop.
Not the prettiest of things, but should look okay when it's powder-coated black.
www.flat-out.com
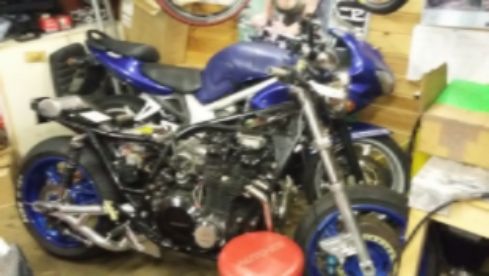
Wiring done thanks to Bob The Wizard, and the Zed rolled back into the Shed of Dread...
Parked next to my SV650 it looks surprisingly small...
Last edited by MDM; 13-07-2016 at 12:15 AM.
www.flat-out.com
It also looks rather good.
Thanks Si!
Originally, my 650 had only had one aftermarket fusebox, with just four fuses, but with a bit more electrickery involved now it needed extra fuses and a second fusebox -
Consequently, rather than have the fuseboxes rattling around, I made up a bracket to weld to the back of the battery box.
www.flat-out.com
Although I've been a bit quiet on the subject of late, I've still been getting into the shed at any opportunity. The bike's getting stripped down now, to get the chain clearance on the frame done, and do the final welding on that and the oil tank mounts. Then it'll be final build...
www.flat-out.com
Hi mate, are you notching or spreading the frame ?Originally Posted by MDM

Notching it Oz - it barely needs it to be honest, and I could probably get away with just shaving the tubes, but I'll do it properly and cut out a section and weld some plate in...
www.flat-out.com
I have even seen it even done with a big fucking hammer when its that close :-), notching is properly cheaper than a 520 chain conversion, when I finish my frame jig I would like to try spreading a frame but in all honestly it isn't any better than a small notch
I'm really digging this build
Hmmm.... I have a hammer. A big hammer...
www.flat-out.com
pssssst I hear the secret is heat........
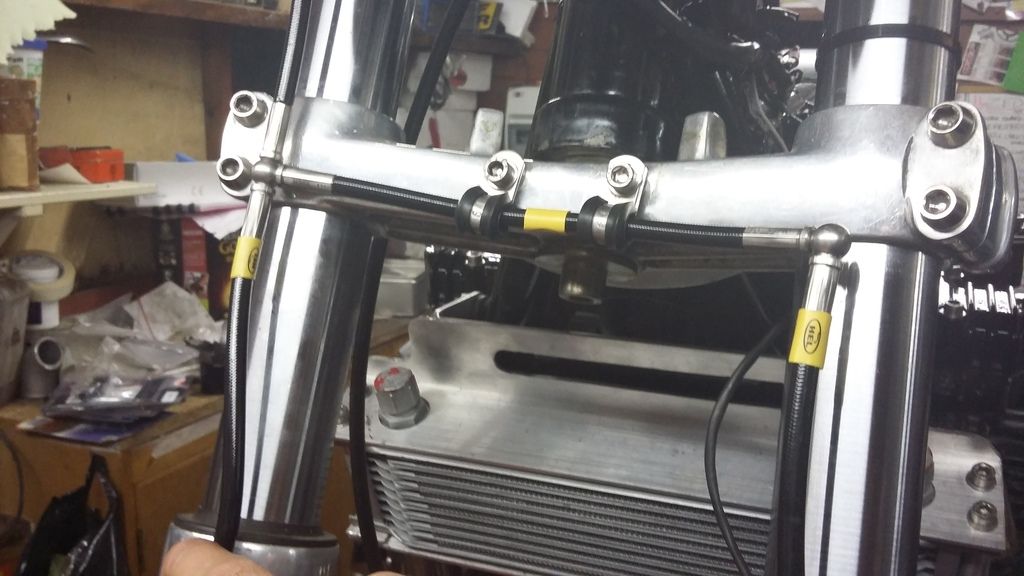
Oh, before I started stripping it I took a trip down to HEL to get some brake lines made up, and to see if I could get the oil lines sorted too.
It fitted rather snugly in the back of my Citroen Berlingo van...
But looked rather better out in the sunshine outside the HEL factory.
I wanted the same spec and style of brake lines as used on the British Superbikes that HEL supply to... like this.
www.flat-out.com
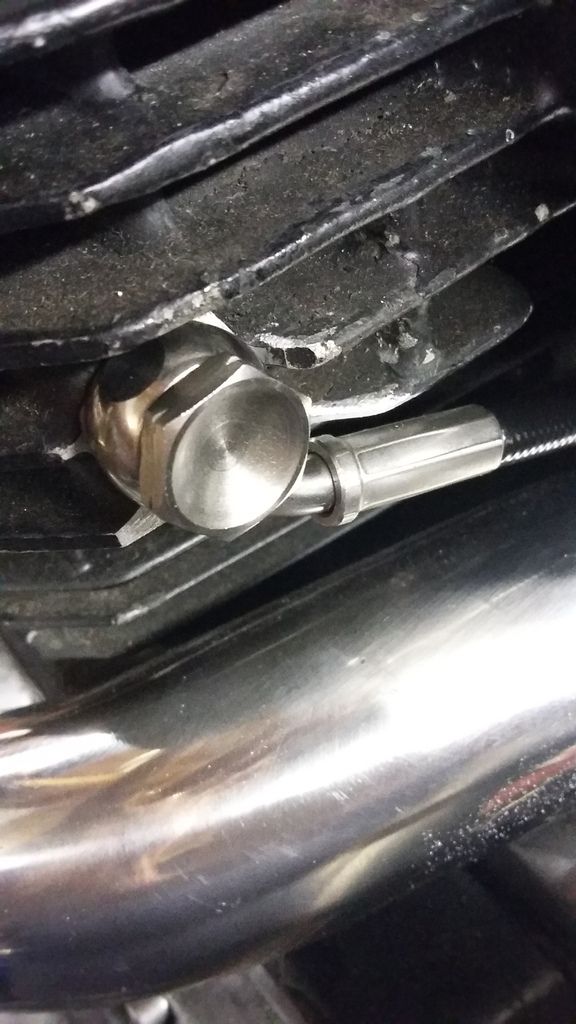
And while I was there, Kev (owner and builder of a very cool Martek Suzuki) also replaced the oil feed lines to the cylinder head with neater, covered lines with swaged fittings - much better than the red and blue anodised stuff that was on there before.
www.flat-out.com
Back home, I remmebered that I needed to amke a bracket to hold the dome-shaped cover over the rear of the boost gauge. I wanted to keep the classic Z look on the clocks, which meant dual covers.
And with the cover drilled to suit twin bolts so that the pressure line for the boost gauge can run through the original mounting hole in the middle
www.flat-out.com
I love those oil line
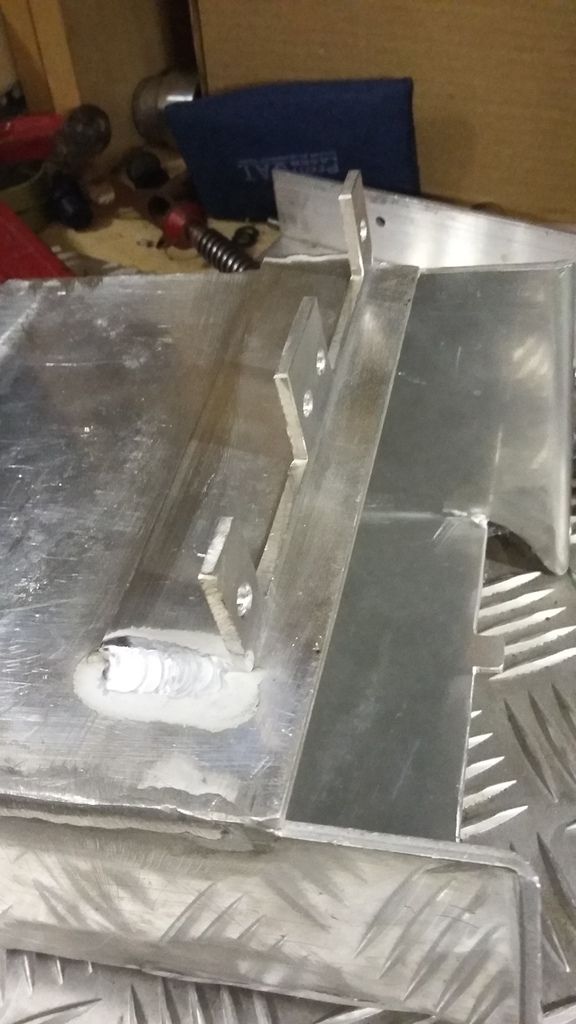
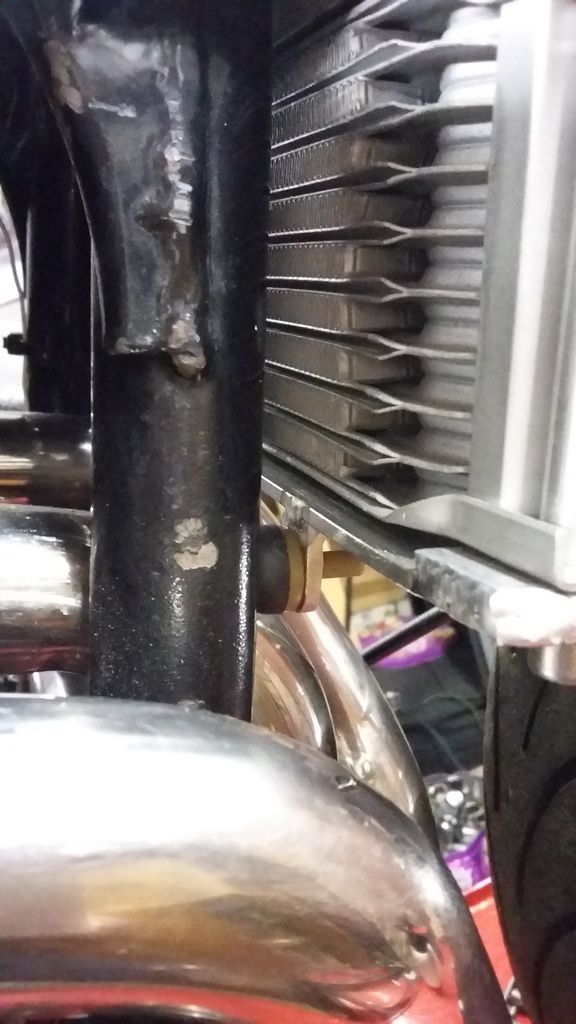
Ages ago, when I made the oil cooler brackets, I said that they'd need a lower bracket & bump stop type thing to stop the cooler from rattling against the frame down tubes. So it was about time that I made them... The L-shaped brackets were welded onto the bottom cooler bracket.
The rubber stops are plumbing washers for some kind of tap that I found in a box of bits, and I'm hoping that they'll be okay with the heat off the header pipes... hmmm, not too sure that they will, but hey ho...
www.flat-out.com
 Posting Permissions


 Reply With Quote


