-
04-08-2016, 11:41 PM
#221
-
05-08-2016, 10:21 AM
#222
Bloke with the stick

I'm not going to say "I'm loving this" again as that's getting old, so I'll just say "Yes!"
Anyway, with those dome tap washers, the centre part of the rubber has a plastic rod through it which will eventually connect with the frame and either vibrate or rattle apart won't it? Something more like this would be a winner: https://www.sinclair-rush.co.uk/cate...6/push-in-feet
Can you tell I've had problems with vibration over the years?
-
06-08-2016, 12:27 AM
#223
Where the 'bump stop' sits against the frame down tubes it contacts with the rubber part rather than the very middle bit as it's slightly offset from the middle of the downtube. I'm hoping that this'll be okay.
Even so, I've had a look at that link ;-) but as they can only be ordered in packs of 50+ it'd be a bit excessive as I only need two. I'll see how well they work (or don't) and keep an eye out for a possible alternative in the meantime...
-
11-08-2016, 07:03 AM
#224
Remember all the palaver with the rear caliper?
Well, the half that I'd 'releived' too much via an over-enthusiastic application of grinder was thrown in the general direction of far-away, and I got hold of another caliper that I split and ground to fit. This time without going so far as to fuck it up... However, this one had the pad pins seized in place, and the piston wasn't too keen on coming out either. I got one pic out by welding a nut onto it, but the other was being more stubborn.
The piston came out after I left the caliper half in the freezer for a weekend, and then heated it on a pan of boiling water only about an inch deep - this was the caliper body expanded but the piston didn;t, and it slipped out like a dream!
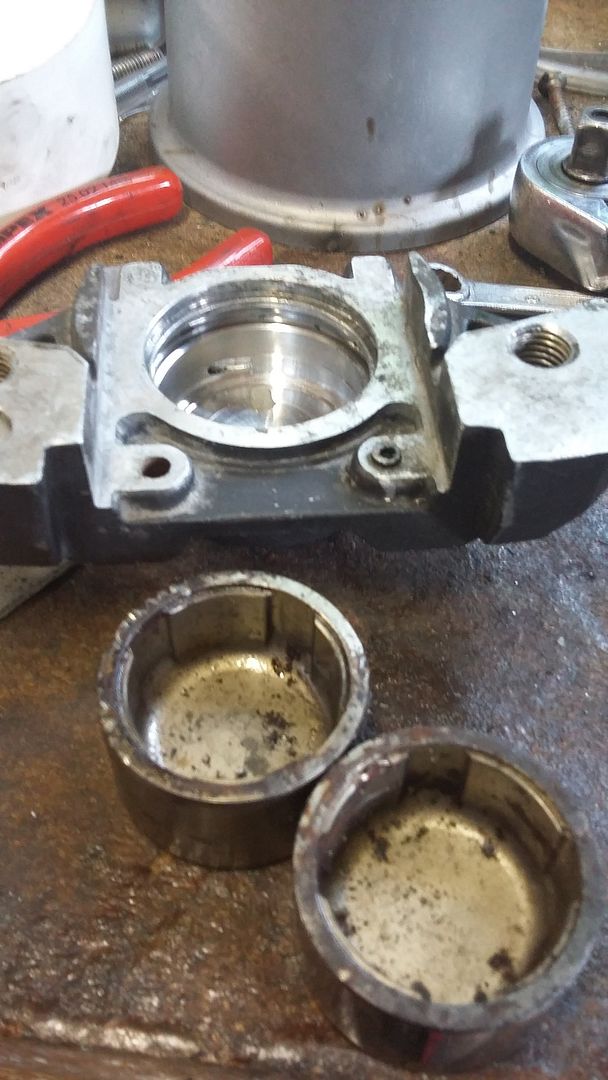
However, the pad pin was still stuck in place. I had to drill a hole though from the outside of the body (carefully measured using the other caliper half) and then drifted it out with a pin punch!
The other half got some treatment too, with the banjo mount tidied up, and the bolt holes countersunk so I could use countersunk stainless allen bolts instead of the standard chunky steel things.

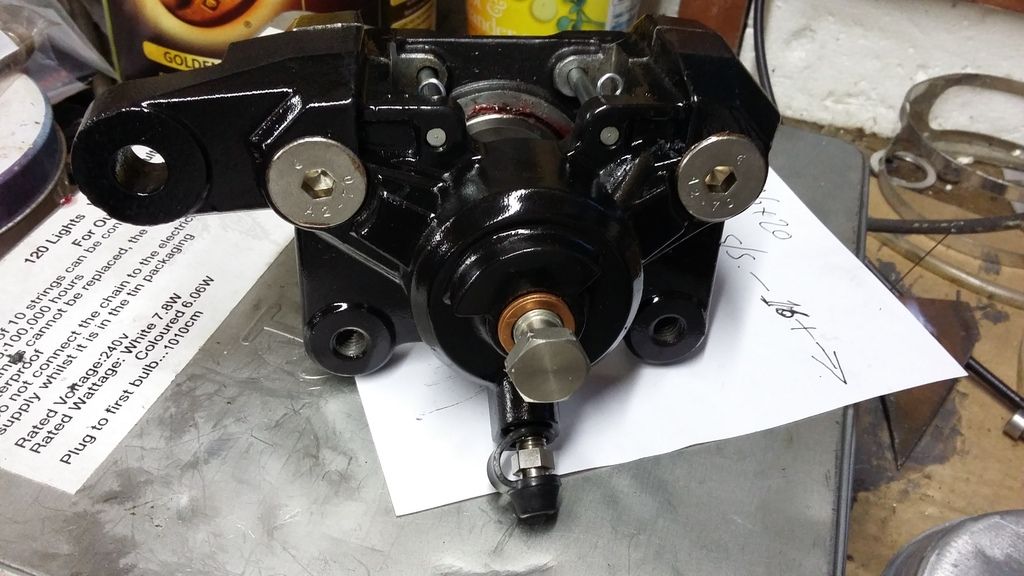
With some paint applied and bolted back together with new stainless bits and new pistons & seals I ended up with this -
-
11-08-2016, 10:09 AM
#225
Tyre destroying, mad bastard menace
-
12-08-2016, 12:22 AM
#226
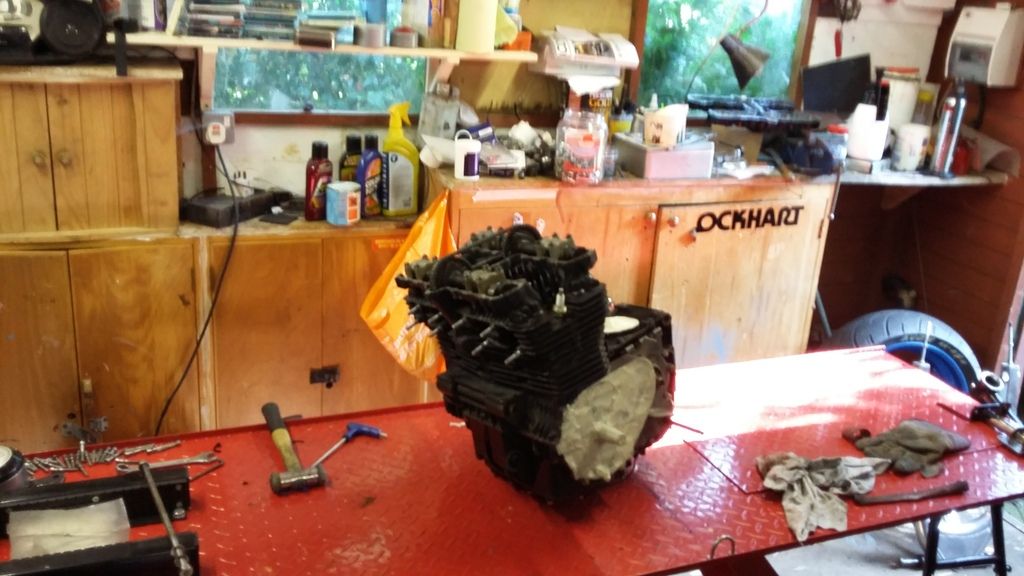
I painted the clutch and ignition casings too...

And the engine and alternator cover, but I didn't take a pic of them for some reason...
-
12-08-2016, 12:34 AM
#227
... oh, hang on, yes I did...

-
12-08-2016, 06:10 AM
#228
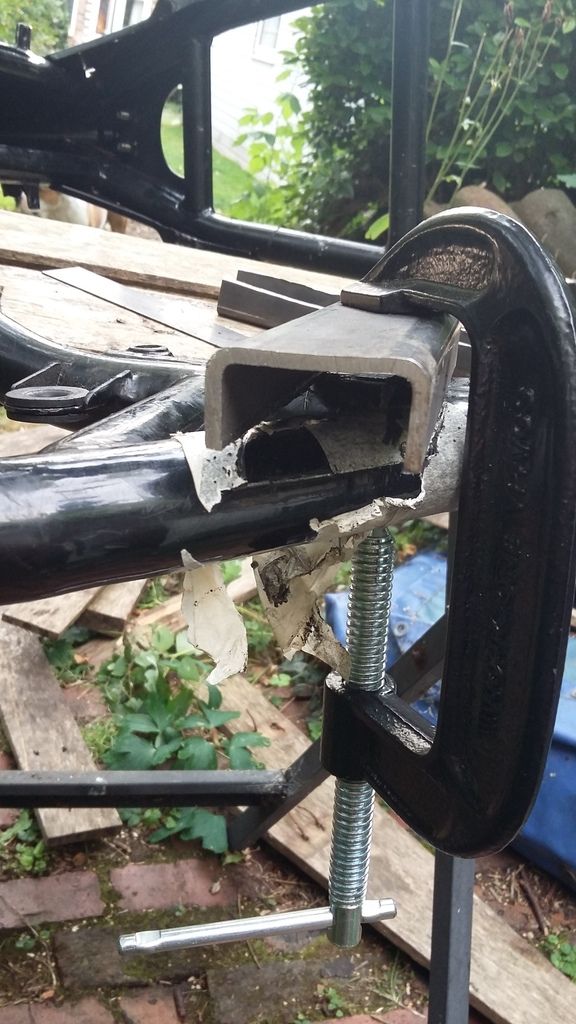
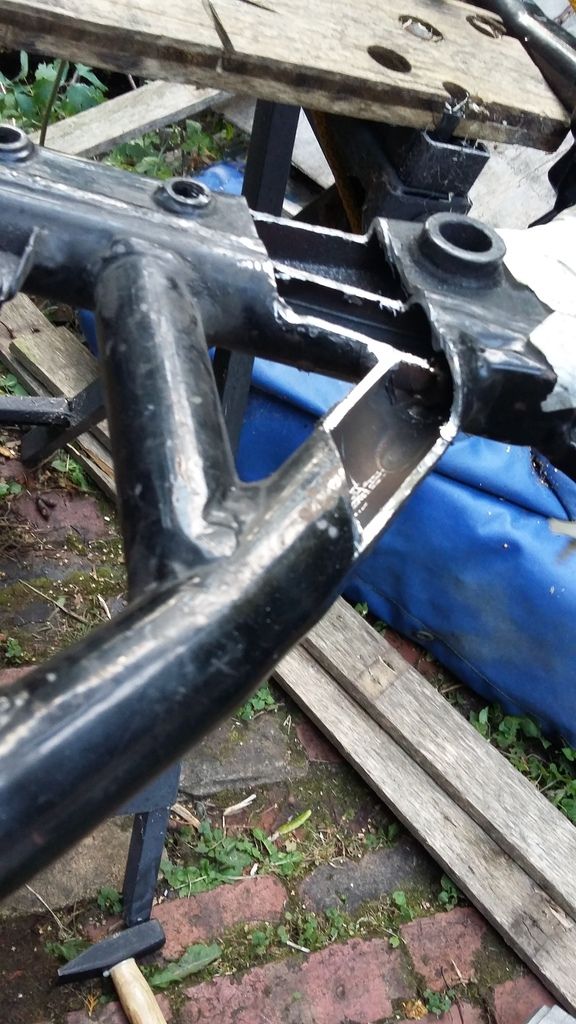
Like I said earlier, to get some decent chain clearance I was going to have to notch the inside of the frame rails or give them a twatting with a big hammer. I chose the former, mainly because I didn't want to get too giddy with the hammer and end up breaking things. Again.
I'd wrapped masking tape around the frame rails when it was built up and with a chain in place, so I could see where I needed clearance. With it all stripped down, I cut a piece of 40mm square box section steel, and split in lengthways to get two pieces of C section.
I clamped a piece on the inside of the frame, parallel with the bracing added in a previous life, and marked it up for cutting.
-
12-08-2016, 06:13 AM
#229
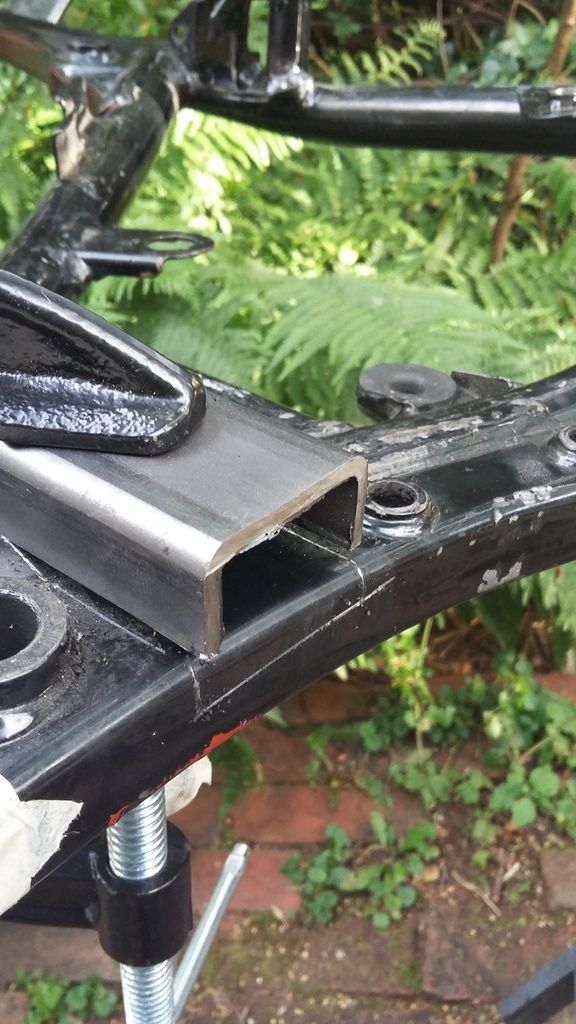
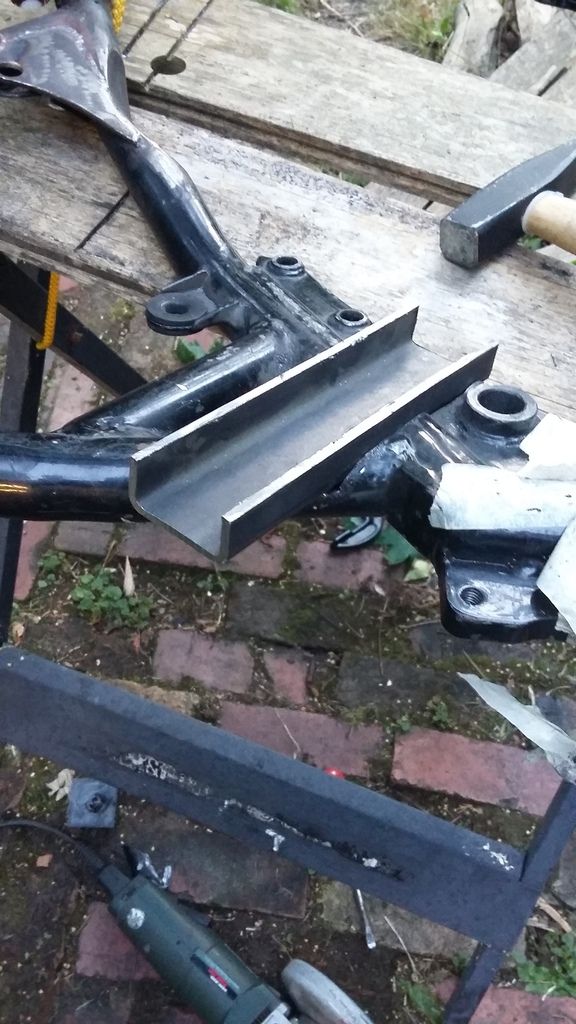
Then I got the angle grinder and files out...
And tried out one of the C section pieces for size, before marking it out and cutting it down to suit.
-
12-08-2016, 06:15 AM
#230
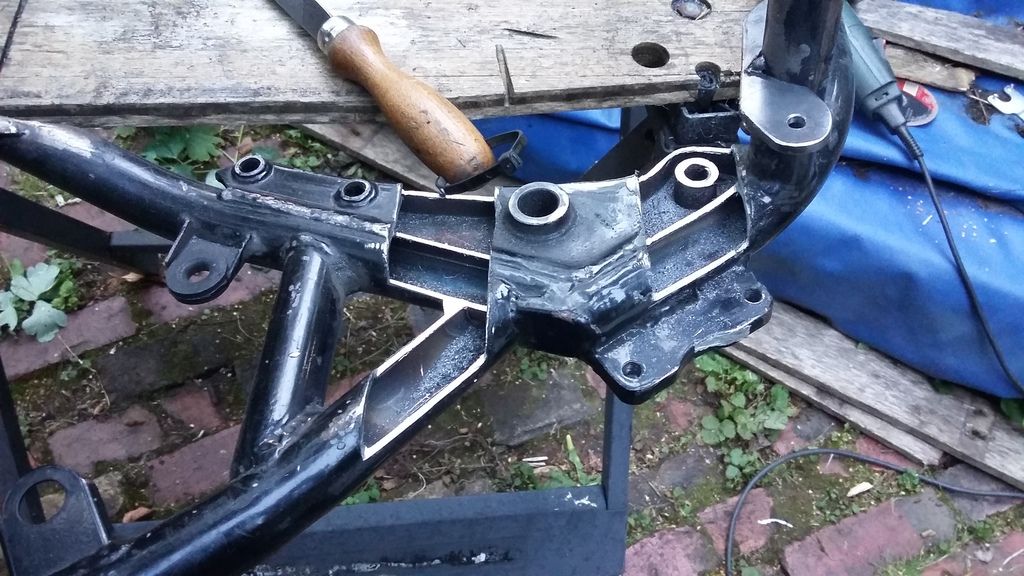
And then proceded to do the same thing for the lower chain run.
-
12-08-2016, 07:14 AM
#231
Tyre destroying, mad bastard menace
-
12-08-2016, 12:21 PM
#232
Bloke with the stick
-
12-08-2016, 07:14 PM
#233
-
19-08-2016, 06:44 AM
#234
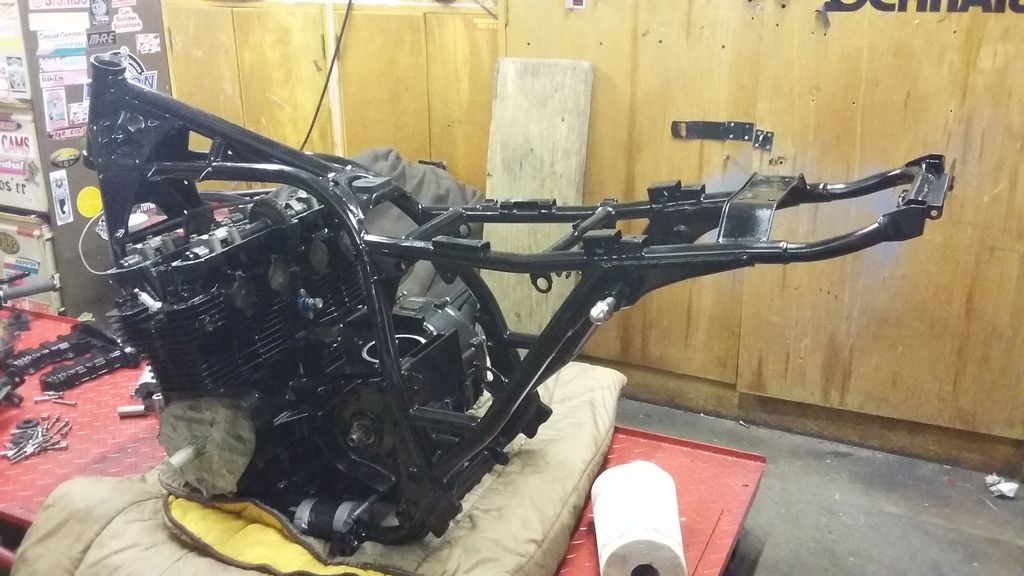
The frame ready for a coat or three of shiny black...
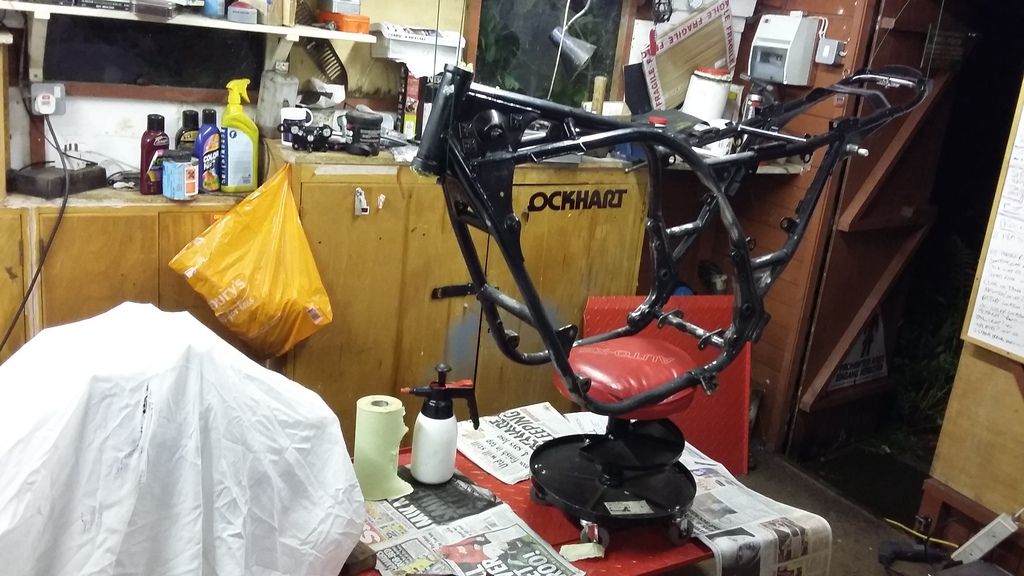
And with that done, it was delicately slipped over the painted engine.
-
19-08-2016, 10:49 AM
#235
Bloke with the stick
Engine colour choice - Achievement: 100%
Frame colour choice - Achievement: 100%
Fucking around - Achievement: 0%
-
21-08-2016, 12:15 AM
#236
Oh, believe me Si, there's been a lot of fucking around! :-)
-
22-08-2016, 10:51 PM
#237
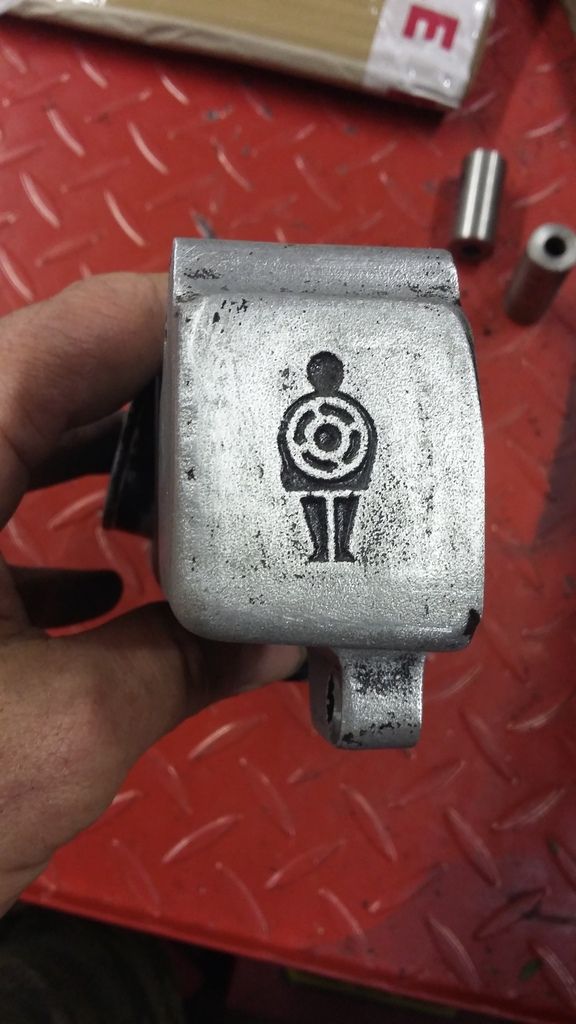
I'd painted the original cast Mr Turbo plenum a few years ago (ahem), and it was looking rather scruffy, so with the engine now all black, I decided that the plenum could go back to the original finish, so started cleaning it up
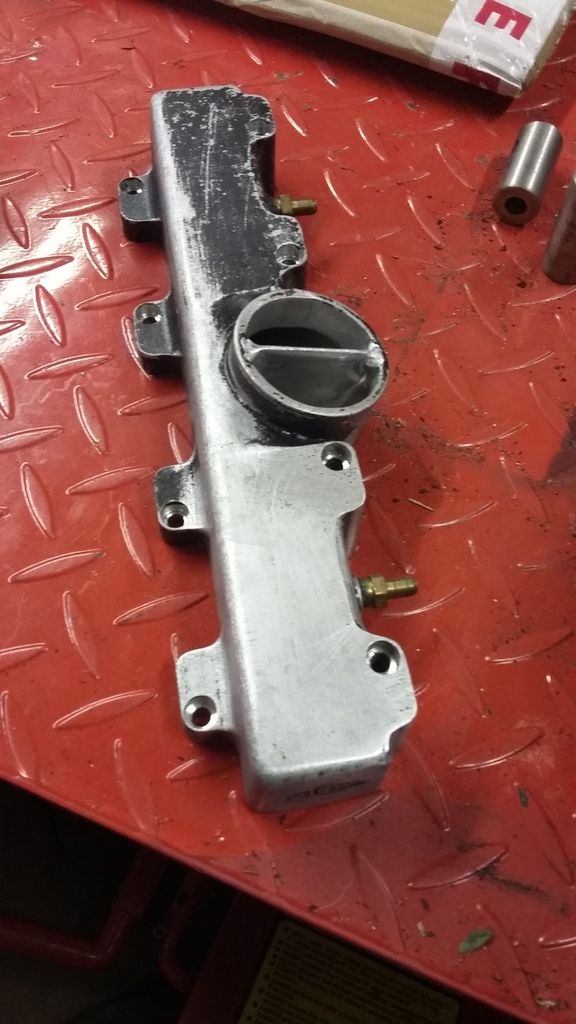
With the added side effect that the Mr Turbo logo would be highlighted
-
23-08-2016, 09:48 AM
#238
Bloke with the stick
-
23-08-2016, 10:45 AM
#239
Aussie Streetfighter Hooligan
I keep getting told the old Mr Turbo kits are too basic and I should look at
blow-though or injected, but I still want one. Proper Old Skool madness !
-
24-08-2016, 12:24 AM
#240
Aussie Streetfighter Hooligan
nice ....will it come with a get out of jail free card ?
 Posting Permissions
- You may not post new threads
- You may not post replies
- You may not post attachments
- You may not edit your posts
-
Forum Rules


 Reply With Quote


