Page 2 of 10 FirstFirst 1234 ... LastLast
Results 21 to 40 of 186

Thread: Project Budget Turbo Dragqueen

  1. #21
    Weekend Warrior
    Join Date
    May 2010
    Location
    Isle Of Harris, Scotland, United Kingdom.
    Posts
    304
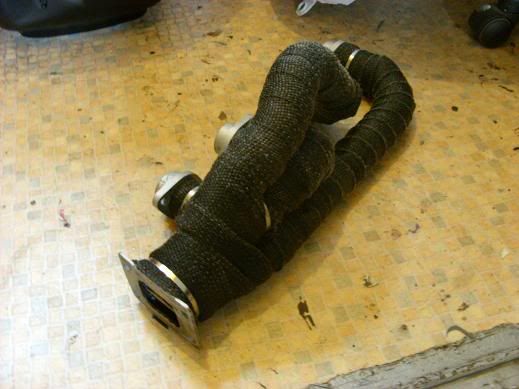
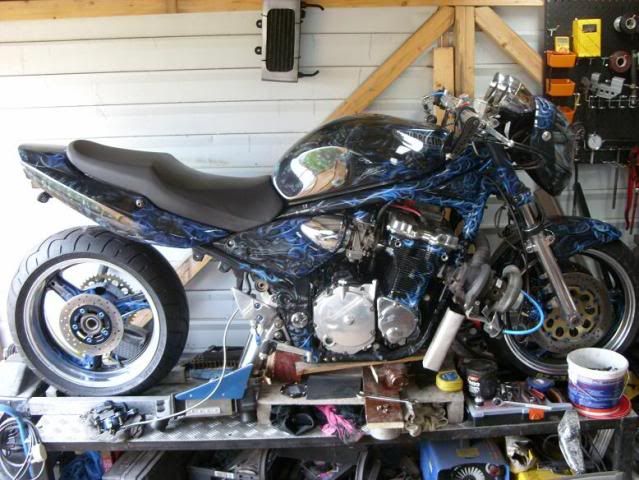
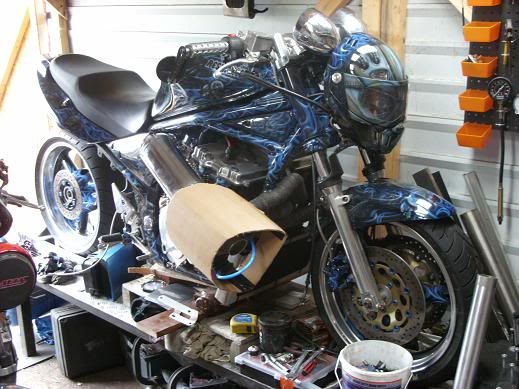
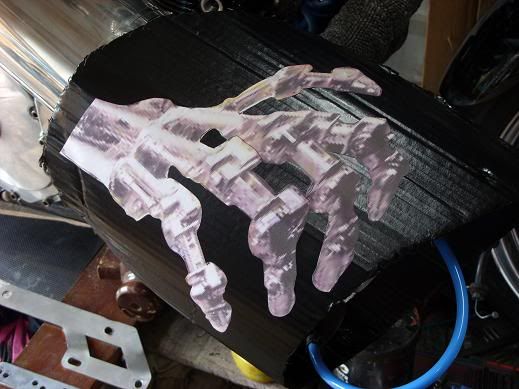
    Got my pipes wrapped tonight. What a twat of a job getting routing of wrap right. Unwrapped it several times n tried different paths to get best coverage n look, etc. Think it was a pita cos of my compact weird header design really tbh. Very tight with hardly any gaps to wrap between.

    Got there in end tho. Looks fairly neat n stainless ties, etc. :-


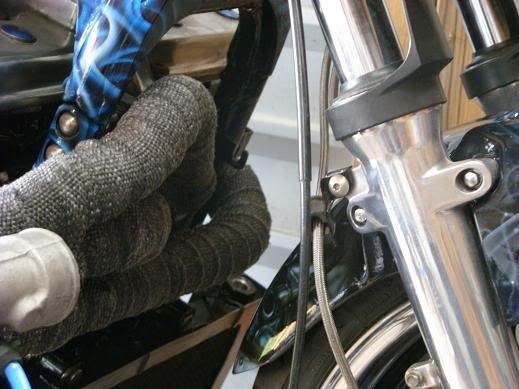
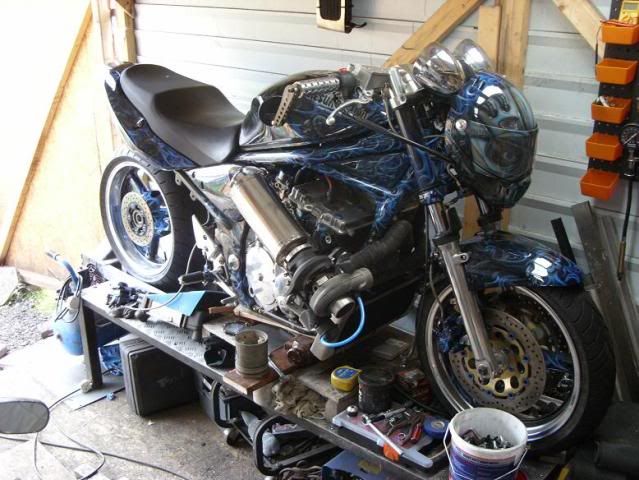
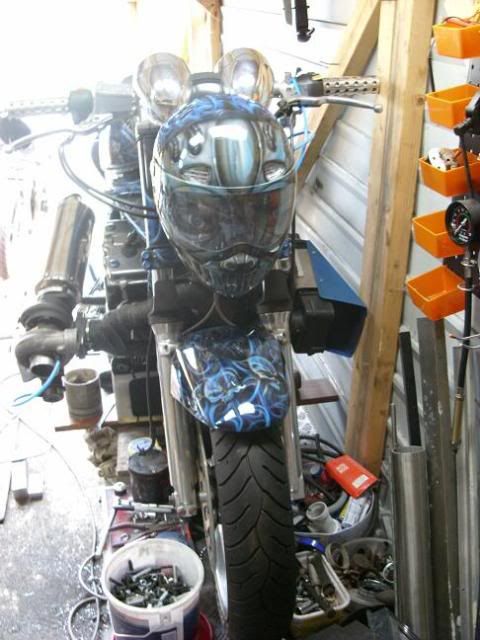
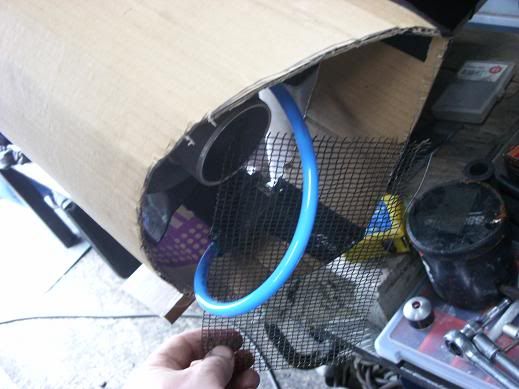
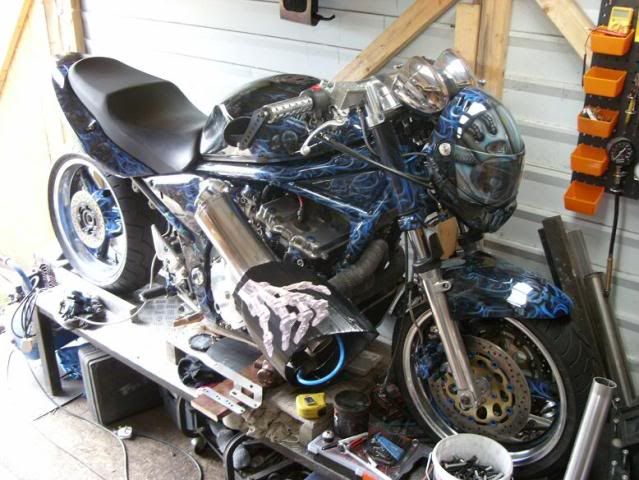
    Weird design I know but best I could come up with. Whole system had to fit into one pipes width in front of frame downtubes for front wheel clearance as front end sooo low. Got 3 pipes stacked to keep width down. Cylinders 2 & 3 merge into vertical 2-1 y-peice on top.

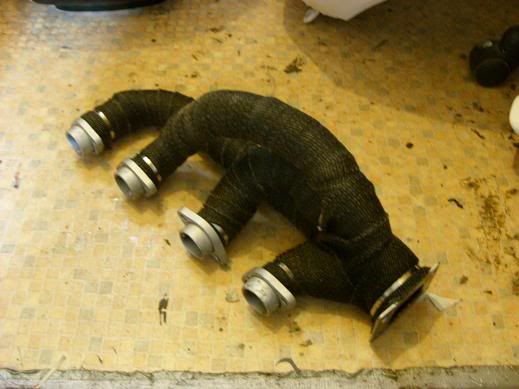
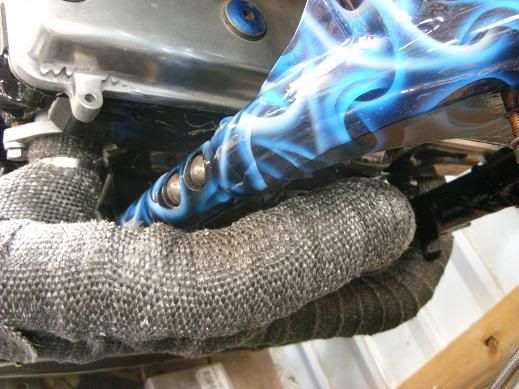
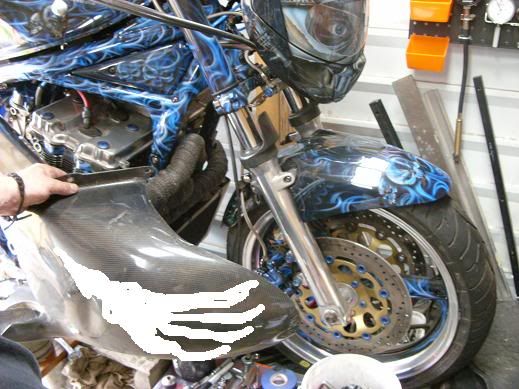
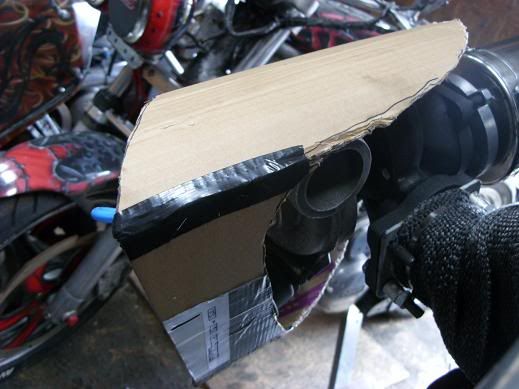
    Cylinders 1 & 4 merge into horizontal y-peice underneath (see underside piccy below):-


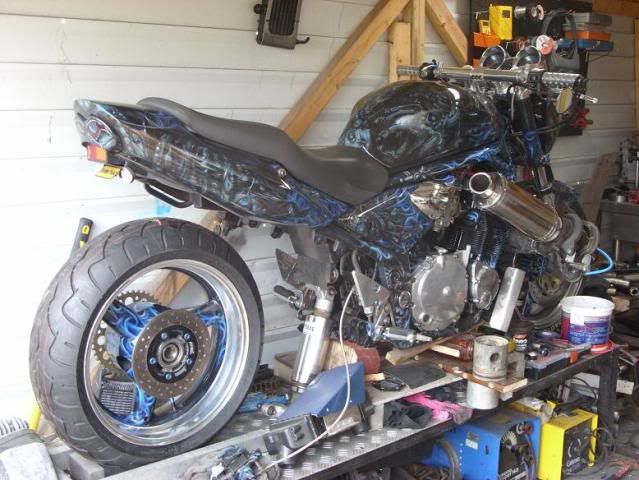
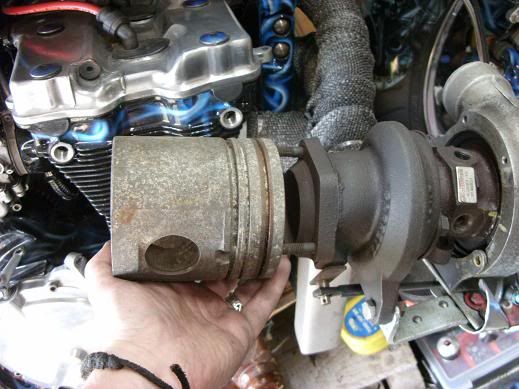
    Both Y-peices merge together into a venutri shaped collector and meet right at turbo inlet:-


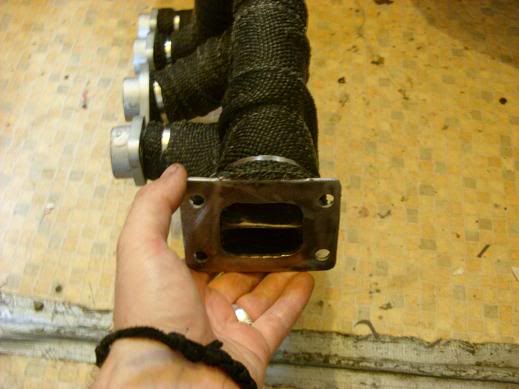
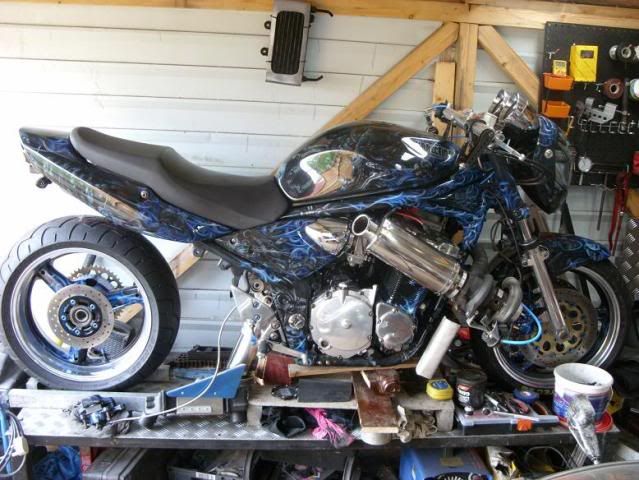
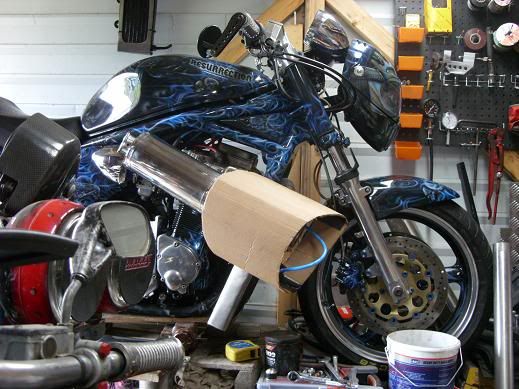
    Had it slipped into engine ports before wrapping so know it fits. Turbo flange sits bout 7-8 cm proud of side of head and slight upwards angle to match cylinder head angle so exhaust pipe sits at right angle to everything else. Turbo slots onto header flange too, so hopefully just a case of bolting everything up.

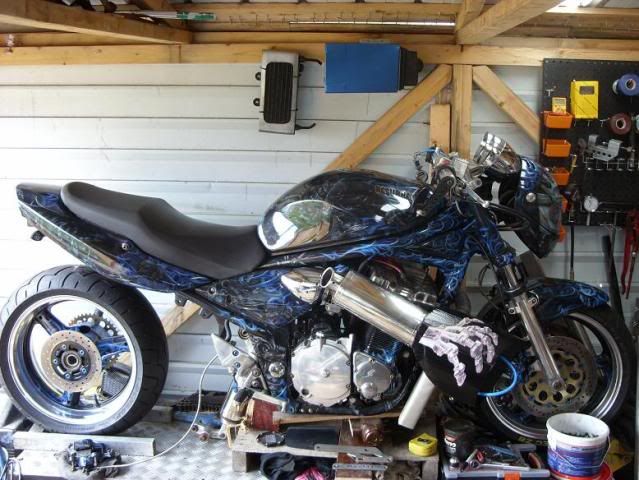
    Not mounting turbo though just yet till get my drilled/tapped camcap bolts for side of head back off Gixerjon so can make n mount a big billet alloy support bracket to take weight of turbo off headers. Smacked crap out of headers with large lump hammer n very strong if ugly arc welding, but rather turbo was supported instead of relying on pipes to hold its weight.

    Was gonna bolt headers on tonight, but ended up lying under hearse in pissing rain using rest of exhaust wrap to quieten down a exhaust joint on it. Was soaked to skin (puddle in boxers!) n sliced my hands a good one on stainless cable ties, so called it a day n lay in bath instead. lol.

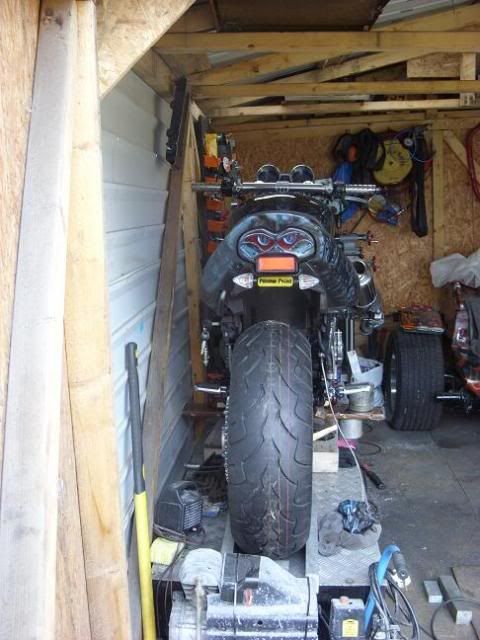
    Get em bolted on next day or two anyway. JUST enough room to slip headers into engine past front wheel. etc on full steering lock so should be fiddly but straight forwards. Just gonna be a pain to get into exhaust bolts, but not end of world. Once theyre on, theyre on for a while.

  2. #22
    as always, sweet!

  3. #23
    Bloke with a smaller stick
    Join Date
    Feb 2005
    Location
    Melbourne, Victoria, Australia.
    Posts
    3,242
    epic read. i think the flange on your headers needs to be thicker. bout 8mm minium. i am using 10mm stainless. also you will need to check it for straightness after welding as it will just piss out exhaust gas.

  4. #24
    Bloke with a smaller stick
    Join Date
    Jul 2005
    Location
    Benalla, Victoria, Australia.
    Posts
    5,765
    Awesome work Jon, I can't wait to see the final result.

    I'm with Deano on the flange thing though. I had the same problem with my first manifold.

    "It's the eighties and I'm down with the ladies"

  5. #25
    Weekend Warrior
    Join Date
    May 2010
    Location
    Isle Of Harris, Scotland, United Kingdom.
    Posts
    304
    I`ll check flange for flatness yeah. Material is about 5-6mm stainless sheet. Biggest I had. Cant nip to my local metal merchants up here cos there isnt any n live on a remote island.

    Seen some t25 gaskets on egay that crush fit as you clamp turbo up. Might get one of them. Someone suggested car CV joint grease or something. Apparently it burns off n solidifies n leaves a good gasket??


  6. #26
    Weekend Warrior
    Join Date
    May 2010
    Location
    Isle Of Harris, Scotland, United Kingdom.
    Posts
    304
    Spraying all this weekend yet again, just like every weekend for months. Starting to grate a bit now. Lol. Getting irritable n dropping off edge of my ninjas back tyre on single track roads. Not a good idea when the side of road is a cliff face round here. Need to unwind methinks. Buried myself into spraying today n got ahead of where expected to be, so might take most of tomorrow off. Wahey! Should probably be starting something else, but going mad from lack of time off n need to refresh.

    Went out tonight tho n bolted on headers. Couldn’t get cylinder 1 tightened up tho as bike against wall n cant move it at moment. Tried lying over top of bike, underneath, squashing down side, etc but was in danger of knocking bike over as Im not that skinny. Lol. Not worth destroying bike and my Harris as it landed on it too. Bolts in place finger tight. Just need tightened up once got back end together n can move it about. Not end of world.

    As you can see tho the system is bloody compact n tight! Had to be really to maximize front wheel clearance. Can see below pipes sit about 10mm from frame downtubes and cam cover at front of engine. Close as you like.:-


    3 pipes stacked keeps width down n space up for front wheel travel. Also no.2 cylinder stays inside frame downtubes and travels up before coming outwards to come round frame. Gives a bit more space also. Tried every trick I could to maximize the space I had available at front. Can try it once back ends on n on its wheels. If too close can raise front end slightly, but looks about right:-


    Turbo stuck in place roughly with one bolt. Need camcap bolts back so can make up a big chunky billet support for turbo to take bulk of its weight off headers to avoid stress cracks down the line. Holds it in place for now tho to get an idea. Took my Ninja n Harris out of garage so could get some decent pics with no other bikes in way. :-


    Exhaust pipe on:-


    Angles back in towards bike:-


    Climbed up on bike n sat on it. Bars are comfy n my knee tucks in with few inches to spare and end can even though pointing in, because has turnout exits just past my knee.

    Can looks a bit big tho so might knock up a simple exit pipe out of stainless instead. Also came across this old random piston I might lathe out innards of n polish up into a mini endcan for something a bit different.:-


    Loud cans up here not a problem anyway and turbo will absorb most of exhaust noise. Can always slot on big can and Db killer insert for MOT`s or down south trips. Lol. I`ll give it some thought n see what I come up with out of scrap I have here.

    Quick wedge of intercooler in place on other side and sitting on top of my lathe got a front on shot, hence pictures so bad cos a lathe aint comfy! Lol:-


    Wide look aint for everyone, but exactly what I planned from outset. Full-on cartoon look! Lol.

    Think it looks lot wider than actually is in reality tho tbh. GSXR lump is really narrow. Took some measurements to get a more realistic idea for you guys:-

    Height from ground to top of handlebars = 3` 3”

    Width of turbo/intercooler + scoops still to go on = 2` 6”

    Length of bike = 7`

    By time scoops go on to cover turbo and intercooler yeah it`ll be wide, but measured against my Harris its only 6` wider than that bikes engine. Z engine measures 2` across! Low height of bike makes it look a lot wider though which is what I was after.

    Scoops will go on over top like in original drawings back at start of project thread somewhere. They`ll have airbrushed chrome look terminator style mechanical 3D claw hands coming out of blue flamework reaching forwards to match helmet nose fairing paintwork as per original plan. Pretty mean kiddy scaring look. Quick mockup with hugger n paint.:-


    Well all seems on track according to original doodles, etc at start of project. Not gonna be a style that appeals to everyone, but that’s what I wanted to build. Long, low and wide. Something attention grabbing n different from the norm. Got me other bikes for playing stupid buggers about the mountain roads on.

  7. #27
    Weekend Warrior
    Join Date
    May 2010
    Location
    Isle Of Harris, Scotland, United Kingdom.
    Posts
    304
    Deano/Iceman. Cheers for watching my back. Checked turbo flange on plate glass and with edge of steel rule. Cant see any deflection. Gonna order up one of those crush fit gaskets anyway to be sure, but hopefully should be ok. Failing that might get a bit of brass plate n make a gasket out of that to joing 2 peices together.

  8. #28
    Weekend Warrior
    Join Date
    May 2010
    Location
    Isle Of Harris, Scotland, United Kingdom.
    Posts
    304
    Quick play about with a cardboard box, knife n gaffer tape. Tryna get a rough idea of how its gonna work n look.


    Front mesh (once find another fireguard in a skip, lol) with air filter poking through front:-


    Back open to allow for compressor outlet pipework:-


    Yup looks big n bulky, but thats what going for this build anyway. Still narrower than lotta production cruisers/tourers tho surprisingly. Think its just cos so low that looks overly wide.

  9. #29
    Power Hungry, Law Disregarder
    Join Date
    Feb 2008
    Location
    brisbane, qld, Australia.
    Posts
    764
    dude good work!! paint is amazing

  10. #30
    Weekend Warrior
    Join Date
    May 2010
    Location
    Isle Of Harris, Scotland, United Kingdom.
    Posts
    304
    Had a quick nosey about. Even thought bandit looks wide at 2` 6”, its still 7”+ narrower than a goldwing. Lol.

    Also only less than an inch wider than a Busa. Lol.

  11. #31
    Weekend Warrior
    Join Date
    May 2010
    Location
    Isle Of Harris, Scotland, United Kingdom.
    Posts
    304
    Everything sorta on hold at minute tbh. Need spare dosh for oil fittings/lines, battery, boost sensitive fuel pressure regulator, n whatever else Ive forgotten about. Think thats mostly it tho tbh.

    Cant get back end together obviously without swingarm, but thats just as of when Yantosh gets the spare time to finish it off. Busy man. Lol. No biggy tho as got most of bits there to put it together when comes.

    Cant make up turbo support bracket n bolt turbo down properly till get drilled/tapped camcap bolts back off Gixerjon when he gets a chance. Once thats bolted up right can get intercooler bolted on n start fitting up ppework between the two, and connections to plenum, etc.

    Still finding the odd bit to do here n there, but struggling a bit tbh. Managed to fix my knackered front brake light switch by cracking open casing n soldering in a new terminal, etc. Yeah theyre only £5-6 brand new off egay, but thats £5-6 towards something else instead of off my budget. lol.

    Sprayed my reworked cardboard turbo cover with rattlecan black n stuck on a printout of rough image I intend to use for hands. Nice image as realy 3D play on perspective to it to emphasize the way scoops will be reaching outwards and forwards.:-


    Gives a much better idea of look n gives me some idea of shape to transfer to templates and then ultimately alloy sheet for both sides. Standing back, yeah it does look a bit mad like its owner. lol:-


    Well more updates as something arrives through post or happens. lol. MUST RESIST URGE NOT TO START ANOTHER PROJECT in meantime. lol. Got some radical plans for ninja kicking round my head.

  12. #32
    Pizza delivery boy/girl
    Join Date
    Apr 2008
    Location
    , , United Kingdom.
    Posts
    68
    you made it Australia Jon , not been here for a while myself

  13. #33
    that thing mad mate,,totally mental,,well done,,,cant wait to see her finished, you on the west side or east side o jockland,,??

  14. #34
    Weekend Warrior
    Join Date
    Sep 2008
    Location
    newcastle upon tyne, tyne and wear, United Kingdom.
    Posts
    118
    Hmmmm..... i dont agree with comment about marrying a yorkshire lass. Geordie ones are much harder. I fell for mine when i saw the way she handled a wheel barrow,good strong back for lifting engine,i thought.

  15. #35
    Weekend Warrior
    Join Date
    May 2010
    Location
    Isle Of Harris, Scotland, United Kingdom.
    Posts
    304
    Yantosh back from TT n welded on end sections to arm in welding jig, so super accurate:-


    Tubular underbrace to shape and add now, but not far off. End sections been reworked with a countersink for some trick flush fit smooth axle covers.

    As for anything else its in Yan`s hands. He`s got artistic license.

    Pictures wont disappear again. Had to splash out £15 on photobucket pro account for unlimited bandwidth as had used my 10Gb allowance in 10 days this time! Lol. Checked stats n hitting average 30-40,000 picture hits a day. Jeezus!

  16. #36
    Weekend Warrior
    Join Date
    May 2010
    Location
    Isle Of Harris, Scotland, United Kingdom.
    Posts
    304
    sensai
    quote:Originally posted by TheBogyman

    that thing mad mate,,totally mental,,well done,,,cant wait to see her finished, you on the west side or east side o jockland,,??
    Waaaaaaaaaaaaaaaaaaaay north and west bud. Isle of Harris. Not found factory where my Harris was built tho yet.

  17. #37
    Weekend Warrior
    Join Date
    May 2010
    Location
    Isle Of Harris, Scotland, United Kingdom.
    Posts
    304
    l.
    quote:Originally posted by dixiethedog

    Hmmmm..... i dont agree with comment about marrying a yorkshire lass. Geordie ones are much harder. I fell for mine when i saw the way she handled a wheel barrow,good strong back for lifting engine,i thought.

  18. #38
    Weekend Warrior
    Join Date
    May 2010
    Location
    Isle Of Harris, Scotland, United Kingdom.
    Posts
    304
    quote:Originally posted by yantosh

    you made it Australia Jon , not been here for a while myself
    Yup Im getting as bad a media whore as you sensai!

  19. #39
    Pizza delivery boy/girl
    Join Date
    Jun 2010
    Location
    Lisbon, , Portugal.
    Posts
    23
    The swinger looks awesome Jon!! Yans the man :O)

  20. #40
    Weekend Warrior
    Join Date
    May 2010
    Location
    Isle Of Harris, Scotland, United Kingdom.
    Posts
    304
    Should look good with brace n end covers on, etc n all polished up to mirror shine.

Page 2 of 10 FirstFirst 1234 ... LastLast

Posting Permissions

  • You may not post new threads
  • You may not post replies
  • You may not post attachments
  • You may not edit your posts
  •